Latest News

Blog

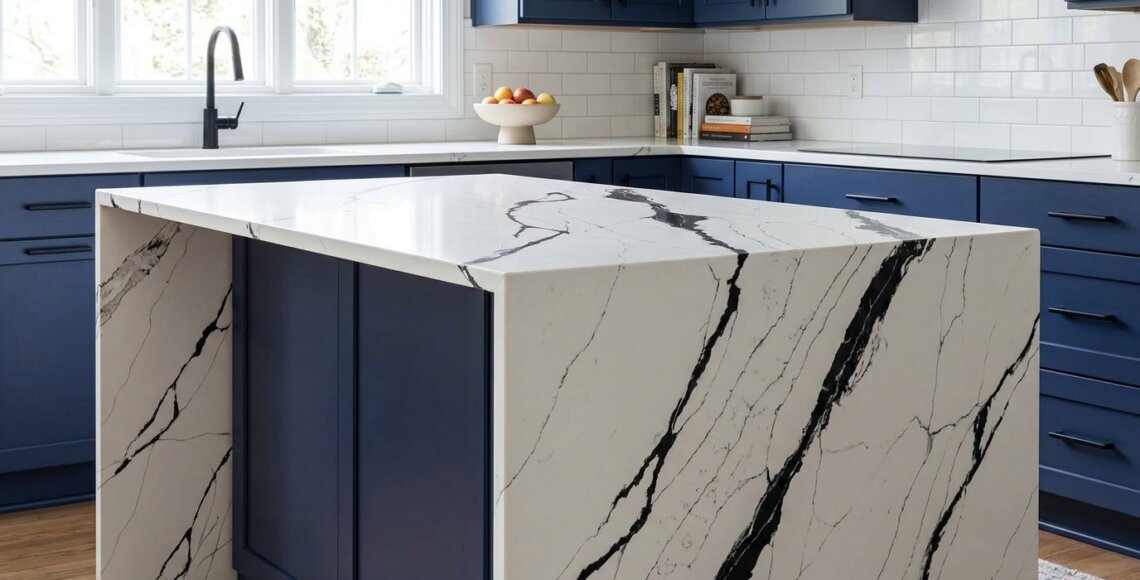
White quartz waterfall island with dark veining aligned across its mitered edge in a Richmond-area kitchen

Waterfall Edge Quartz Islands in Richmond, VA: Costs and Choices

Choosing quartz for a waterfall edge quartz island in Richmond, VA, starts with the look you want across the top and sides. Unlike natural stone, quartz is designed, rather than selected as a unique natural slab, so focus on how its color and pattern will carry through the island’s full design.

With waterfall sides, the surface shapes the look of the entire kitchen countertop layout, not just the island top. Pattern, dimensions, panel placement, and edge details all affect the finished design, so plan them before fabrication begins.

This guide covers what to consider when choosing quartz, how professional measuring and templating inform the design, and how fabrication, delivery, and countertop installation fit together. You’ll get a clearer view of the decisions involved and how thoughtful planning can turn your island idea into a finished feature.

Key Takeaways

  • Understand how material selection affects whether you can choose a specific slab or focus on a quartz design.
  • See how measurements, the kitchen layout, and the countertop support structure shape waterfall island planning.
  • Learn how fabrication and installation turn design details into a finished island.
  • Compare quartz colors and patterns with other countertop materials to find a fit for your kitchen and daily needs.

Planning a Waterfall Edge Quartz Island in Richmond, VA

For a waterfall-edge quartz island in Richmond, VA, begin with the kitchen countertop layout and the countertop support structure. Quartz suits a coordinated look, while granite and quartzite offer natural variation; porcelain is another surface option. The right fit depends on your design priorities, intended use, and project details.

Templating follows the design plan. A fabricator measures the island top, cabinet edges, overhangs, sink or cooktop openings, and waterfall panels. These measurements guide fabrication and help align the pattern across the top and sides. The process then moves through fabrication, delivery, and installation. The same planning can also cover kitchen countertops and bathroom vanity tops.

Measure clearances around the island in relation to cabinets, appliances, walkways, and doors. The template also records the island’s length, width, finished height, and panel dimensions. In Richmond, permits may apply if the work involves electrical, plumbing, or structural changes. Requirements depend on project scope, so a countertop replacement differs from a broader remodel.

Installation timing follows the project sequence: measurement, fabrication, delivery, and fitting. Countertop removal and site readiness also affect when installation can proceed, so there isn’t one schedule for every kitchen. During countertop removal, the existing surface comes out before the countertop support structure is prepared. Waterfall edges need careful handling because exposed corners can chip from impact; follow the surface’s care guidance for routine cleaning. Service areas include Richmond and the surrounding Central Virginia communities, with expert craftsmanship provided by Absolute Stone Design.

Project Details That Shape Your Island Design

Start by defining the island’s shape and how many sides will have finished panels. A waterfall on one end requires a different surface plan from matching panels on both ends. The kitchen countertop layout matters too: a long island beside a full-height backsplash creates a different visual balance from a compact island with open sides.

Quartz pattern direction is another decision. If veining runs across the island top, panel placement can help create a coordinated appearance. Natural stone, including marble, varies from slab to slab, so selecting a particular piece helps define the final look. At a Richmond showroom, viewing a slab in person makes color, veining, and surrounding finishes easier to compare.

Existing conditions shape the work plan. Cabinet placement, countertop support structure, and sink or cooktop openings all affect fabrication details. For example, the sink location must be incorporated into the island design. If the project involves countertop removal, coordinate that work before fitting the new surface.

Let daily use guide the island’s details. A seating overhang affects how people gather, while nearby appliance doors need space to open. Pendant lights can make the island a focal point, so consider their placement in relation to the surface. In Richmond-area homes with open kitchens, check how the waterfall panels look from adjoining rooms. Cabinet finishes, flooring, and a nearby marble backsplash also shape the overall composition, helping the island feel connected to the room.

Custom Quartz Fabrication and Installation

Once the design is set, fabrication turns the approved plan into finished quartz pieces. Installation then fits the island components into the kitchen.

Custom Countertop Fabrication

Fabrication begins with the approved template and quartz selection. The fabricator plans the island top and waterfall panels as connected pieces, accounting for edges, openings, and visible seams. If the chosen pattern has prominent veining, panel placement can help create a coordinated appearance. Review the colors and design details during stone fabrication approval, before cutting begins. In-house fabrication keeps the planned details connected to the finished pieces.

Countertop Installation Service

During countertop installation, the team brings the fabricated pieces into the kitchen and positions them on the prepared countertop support structure. The top and side panels must follow the approved design, including the island’s edges and any sink or cooktop openings. Careful handling protects exposed corners. The team checks the fit and joins the pieces so the waterfall reads as one intentional design.

  1. Confirm the approved quartz selection and design details.
  2. Use the template to guide the planned cuts and panel shapes.
  3. Fabricate the island top, edges, and waterfall panels.
  4. Deliver the finished pieces for fitting in the kitchen.
  5. Align and secure the components during countertop installation.

Each stage shapes the next: a clear template guides fabrication, and precise fabrication supports a clean fit. For example, matching veining across the top and side starts with panel planning and continues through cutting and installation.

Waterfall Edge Quartz Islands in Richmond, VA: Costs and Choices

White quartz with soft gray veining is a familiar choice for waterfall islands. It keeps the kitchen feeling light while adding movement across the top and side panels. Solid white creates a quieter look beside detailed cabinetry. Gray with fine white markings can tie together stainless appliances, pale tile, and cool-toned cabinets.

For a warmer palette, cream and beige quartz can complement wood cabinets, brass hardware, or tan flooring. A subtle pattern adds depth without competing with a stone backsplash. Dark charcoal or black surfaces create stronger contrast against white cabinets and light floors, making the island’s shape stand out, especially when both waterfall panels are visible.

Pattern direction matters as much as color. Broad veins can become a focal point as they continue from the countertop onto the waterfall sides, while fine, scattered markings create a more even appearance. Before fabrication, consider how the pattern will meet at the island’s corners and where seams may fall. The same color can look different across a large island than in a small sample.

Compare quartz samples with your kitchen’s fixed finishes, including cabinet doors, flooring, and backsplash tile. View them in daylight and evening light, as lighting can change how whites and grays appear. Warm wood with cream quartz creates a softer palette, while black quartz with white cabinets feels more graphic. Consider the island top, side panels, and surrounding finishes together.

Choosing Quartz for Your Kitchen Island

Choose an island surface by balancing appearance, daily routines, and the look you want across the waterfall sides. Quartz offers designed colors and patterns, while natural stones have distinctive variation. Decide whether you prefer a coordinated surface or the individual character of a particular slab, and consider how the island will relate to nearby counters and cabinetry.

Granite, marble, and quartzite are natural stones, so their colors and markings vary from slab to slab. Viewing the specific slab helps you understand the pattern that will shape the island. Granite is easy to clean and can last for decades. Marble brings its own natural character, while quartzite offers another natural-stone option to consider.

Quartz and porcelain offer alternatives to natural stone. Choose by comparing the look you want with the surface care that suits your household. Ask how to handle routine cleaning, then follow the guidance for your chosen material. For a waterfall design, consider how the surface will look across the top and exposed sides.

Before deciding, compare full-size views when possible, not just small samples. Look at the material beside cabinet finishes, flooring, and backsplash choices. Then consider pattern continuity, visible seams, and the island’s role as a focal point. A quiet surface lets cabinetry stand out, while stronger veining draws attention to the island. Choose a surface that suits your kitchen’s style and how you use the space.

Your next step is to turn the island idea into a clear design direction. Consider how the quartz pattern should carry across the top and waterfall sides, and how the finished island will complement your kitchen. A waterfall edge quartz island in Richmond, VA, feels at home when its details are planned around your space and style.

Absolute Stone Design offers countertops in quartz, granite, and marble, giving you material options to consider for your project. The team’s hands-on experience with measuring, in-house fabrication, and installation helps carry approved design details through to the finished surface.

Bring your preferred look and project plans together, then take the next step with Absolute Stone Design. Your island can start with a thoughtful choice and become a distinctive part of the kitchen you enjoy every day.

Frequently Asked Questions

What does “waterfall edge” mean?

A waterfall edge continues the countertop surface down one or both sides of the island, creating a finished vertical panel. The design makes the island’s side part of its visible composition rather than leaving the cabinet end exposed. It can frame the island as a distinct feature, especially in kitchens where its sides are visible from adjoining spaces.

Can a waterfall edge suit a traditional kitchen?

Yes. A waterfall island can suit different kitchen styles when its surface, cabinetry, and surrounding finishes work together. In a traditional room, a quieter quartz pattern and classic cabinet details can keep the island connected to the existing design. Treat it as part of the room’s character, rather than as a separate trend-led feature.

Can I preview design options before making a selection?

Absolute Stone Design’s kitchen and bath visualizer tool helps you preview options and explore possible combinations before making final decisions. Use it to develop a general direction, then consider how the selected surface and finishes look together in your kitchen’s lighting and beside its existing materials.

Do the island and perimeter countertops need to match?

No. A coordinated kitchen can use a different surface or color on the island, as long as the materials feel intentional together. A distinctive island can stand apart while perimeter counters take a quieter role. Repeating a finish in cabinet hardware or a nearby accent can connect the two areas without making them identical.

How can I make the island a focal point without overwhelming the kitchen?

Give the island one clear design feature, such as a waterfall side or distinctive surface, and let other finishes play a supporting role. If the cabinetry has strong detailing, a restrained island pattern can balance the room. In a simpler kitchen, the island can bring more visual interest while still relating to the surrounding finishes.

What should I bring to an initial design conversation?

Bring inspiration images, cabinet or flooring samples, and any kitchen plans you have. Room photos can help communicate the current layout and finishes. If you’re working with an interior designer or remodeling collaborator, their design direction can help align the island with the wider project. These references make it easier to discuss the look you want.
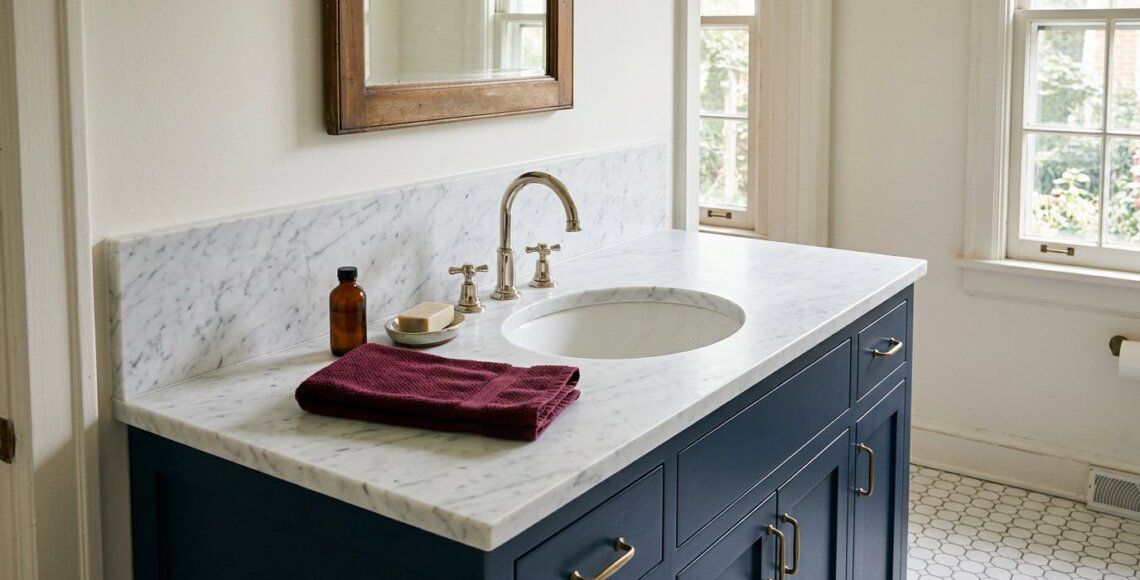
Carrara marble bathroom countertop with natural gray veining in a Richmond bungalow vanity

Marble Bathroom Countertops: Slab Costs and Design Examples

Marble bathroom countertops bring natural veining and a refined feel to a vanity, while offering heat resistance that can be useful around shower steam and styling tools. Their beauty does come with care considerations: marble can be susceptible to staining, etching, and moisture intrusion, so choosing the right design also means thinking about how the surface will be used and maintained. If you’re drawn to marble, you’re likely weighing its timeless look against everyday practicality; this guide explores bathroom design ideas, the factors that shape slab selection, and how marble’s heat resistance fits into a real home, so you can make a more confident choice for your space.

Key Takeaways

  • Compare marble colors, veining, and finishes to find a vanity surface that suits your bathroom’s style and everyday care needs.
  • Explore design choices such as pairing a stone countertop with coordinated bathroom tile for a more unified look.
  • Marble offers heat resistance, but its porous surface can be vulnerable to staining, etching, and moisture, so plan for thoughtful care.
  • Weigh marble’s natural character against quartz and granite to choose a countertop material that fits your priorities.

Marble Slab Options for Bathroom Countertops

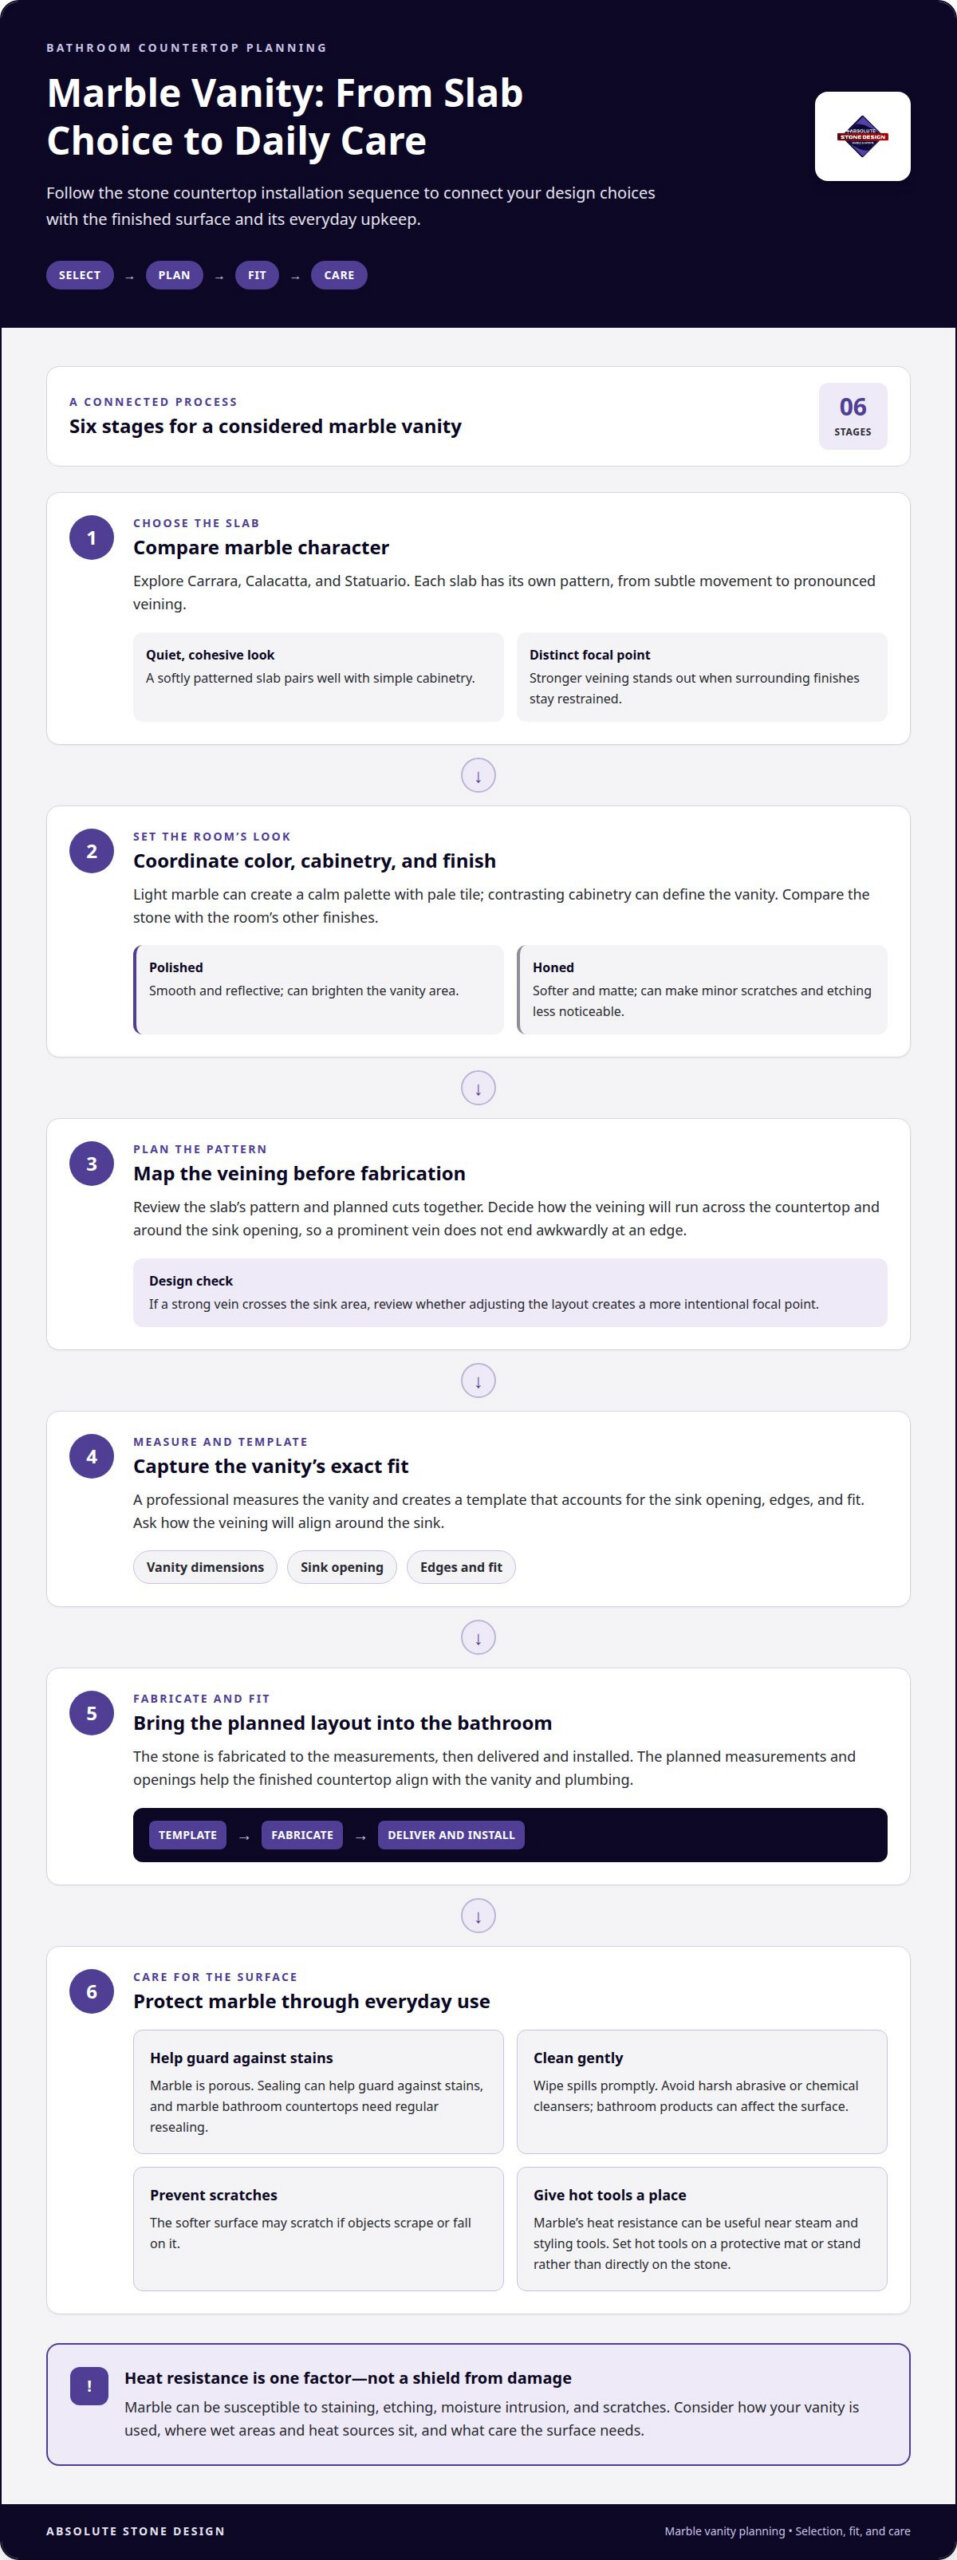
Carrara, Calacatta, and Statuario are familiar marble choices for bathroom vanities. Each slab has its own natural pattern, from subtle movement to pronounced veining. For a quiet, cohesive design, pair a softly patterned slab with simple cabinetry. To make the vanity a focal point, choose stronger veining and keep surrounding finishes restrained.

Finish affects both appearance and how minor wear shows. Polished marble has a smooth, reflective surface that can brighten a vanity area. Honed marble has a softer, matte look and can help conceal minor scratches and etching. In a busy shared bathroom, for example, a honed finish can make small marks less noticeable. It changes the look, but marble still needs care.

Color and layout work together. Light marble can complement pale tile for a calm, continuous palette, while contrasting cabinetry can define the vanity. Before fabrication, plan how the veining will run across the countertop and around the sink opening. This helps the finished surface look intentional, rather than leaving a prominent vein awkwardly cut at an edge.

Marble is porous, so moisture and staining are considerations in a bathroom. Sealing can help guard against stains, and marble bathroom countertops need regular resealing.

Marble can stain or etch, and its softer surface may scratch if objects scrape or fall on it. Avoid harsh abrasive or chemical cleansers. Wipe spills promptly and use gentle cleaning methods, since bathroom products can affect the surface.

Before buying, ask the countertop installer how the slab will be measured, how its veining will align around the sink, and what finish and sealing care it needs. Those details connect your design choice to fabrication and everyday maintenance.

Bathroom design inspiration featuring marble countertops

Marble brings natural pattern and a refined focal point to a bathroom. Its distinctive veining and heat resistance are advantages; susceptibility to staining, etching, moisture, and scratches are drawbacks to consider. In a calm, light-toned bathroom, for example, a marble vanity can add movement while simple surrounding finishes keep the space balanced.

For a cohesive look, coordinate the slab’s veining with the room’s other finishes. In a compact bathroom, a pale marble top paired with understated cabinetry can keep the vanity from feeling visually heavy. In a larger room, a more strongly veined slab can anchor the design. Simpler tile and fixtures allow the stone to stand out.

Care matters after installation. Marble is porous, so regular sealing can help guard against stains. A professional can renew the protective seal as part of ongoing maintenance; timing depends on the surface’s condition and exposure to moisture. For daily cleaning, wipe spills promptly and avoid harsh abrasive or chemical cleansers.

For installation, a professional measures the vanity and creates a template that accounts for the sink opening, edges, and fit. The stone is fabricated to those measurements, then delivered and installed. This process helps align the finished countertop with the vanity and planned plumbing openings. For homeowners undertaking a broader renovation, working with an experienced team like Black Bear Construction can help coordinate the vanity, plumbing, and surrounding finishes into a cohesive space.

Before fabrication, review the slab’s pattern and planned cuts together. If a prominent vein crosses the sink area, for instance, adjusting the layout may create a more intentional focal point. This connects material selection to the finished room.

Marble Bathroom Countertops: Slab Costs and Design Examples

Heat resistance

Marble’s heat resistance can be useful around shower steam and heat-styling tools. After a warm shower, for example, steam may linger near the vanity, making marble a suitable surface for this setting. Heat resistance does not make the countertop immune to damage, so thoughtful placement and care still matter.

Consider a morning routine that includes a curling iron or hair dryer. Set styling tools on a protective mat or stand rather than directly on the stone. This gives hot tools a dedicated resting place and keeps them off the vanity surface. Clearing space near the mirror can also make getting ready easier.

Heat is only one part of bathroom performance. Marble is porous and can be susceptible to staining, etching, and moisture intrusion, so pay attention to regular exposure to water and personal-care products. If a bottle leaks beside the faucet, wipe it up promptly and use gentle cleaners. These habits help protect the surface without changing its natural appearance.

During design planning, consider where heat sources and wet areas sit in relation to the countertop. If styling tools are kept beside the sink, include a safe resting spot in the vanity arrangement. If steam gathers around a mirror, consider how the countertop finish and surrounding materials work together. A well-planned layout reflects your routine as well as the slab’s appearance.

Marble’s heat resistance can make it a fitting option for a bathroom exposed to steam and styling tools. Pair that advantage with sensible care, especially around moisture and personal-care products. This balance lets you enjoy the stone’s distinctive look while accounting for everyday use.

How does marble compare with quartz and granite for bathroom countertops?

One difference you’ll notice first is marble’s natural veining, which gives each slab individual movement. Granite is also natural stone, while quartz countertops offer an engineered surface option. Marble can add distinctive pattern to a calm bathroom palette. If you prefer a more consistent look, compare quartz slabs alongside marble before choosing.

Marble’s beauty comes with care considerations. It is porous and may be susceptible to staining, etching, and moisture intrusion. Its softer surface can also scratch if an object drops or scrapes across it. In a busy family bathroom, for example, frequent spills and daily grooming may make maintenance an important part of your material decision.

Compare materials according to your priorities rather than assuming one always performs best. If natural variation matters to your design, review marble and granite slabs for their patterns. If you want to consider an engineered option, view quartz samples beside your tile and cabinetry. Seeing the materials together shows how each choice may shape the room.

Use a simple selection process: decide how much natural pattern you want, consider the care you’re comfortable providing, then compare samples in your bathroom’s lighting. Honed marble, for instance, can help conceal minor scratches and etching, but it still needs care. Choose a surface that balances appearance with how the vanity will be used.

For marble bathroom countertops, plan on regular resealing and avoid harsh abrasive or chemical cleansers. Granite and quartz have different material characteristics, so discuss the specific slab and finish during selection. Reviewing marble, granite, and quartz side by side can clarify which surface best suits your bathroom’s design and daily routine.

Marble can scratch when objects are dropped or scraped across it, so consider how the vanity is used when comparing it with granite or quartz. A countertop choice is about more than appearance: the possibility of surface marks may affect how comfortable you feel using the space. Weigh that concern against marble’s distinctive veining and the care routine you’re prepared to maintain.

Absolute Stone Design: Countertops

Absolute Stone Design helps you move from comparing marble and quartz to planning a bathroom countertop that fits your space. Its countertop work includes precision measuring, templating, in-house stone fabrication, delivery, and installation. That process is useful when you’ve chosen a marble look and need the slab shaped for your vanity and sink.

For a marble design, the slab’s veining and finish guide the visual plan. Measurements and a template shape the countertop to the vanity, while fabrication turns the selected stone into a fitted surface. Granite is another natural-stone option. Comparing both materials with your bathroom’s tile and cabinetry can help you choose a cohesive pattern.

Bathroom tile work can coordinate the surfaces around the vanity. A quieter tile, for example, lets expressive marble veining take the lead, while more detailed tile creates a layered look. Considering these finishes together helps clarify the room’s design direction.

Absolute Stone Design handles residential and commercial countertop projects. If you’re considering a marble or granite countertop, share your material preferences and project needs to plan a surface suited to your bathroom. The team’s process covers measurements, fabrication, delivery, and installation, with the details shaped around your space.

To discuss your bathroom countertop project, contact Absolute Stone Design.

Frequently Asked Questions

What types of marble are best for bathroom countertops?

Carrara, Calacatta, and Statuario are popular choices for marble bathroom countertops, each with distinctive natural veining. The right fit depends on the look you want and how much variation suits your room. Compare slab samples with your vanity cabinet and tile to see whether the stone’s pattern complements your planned finishes.

What project details shape a marble vanity installation?

The installation plan depends on the vanity’s dimensions, selected slab, edge design, sink opening, and site conditions. These details determine how the stone is measured, fabricated, and fitted. A vanity with an unusual shape, for example, needs a template that captures its full outline. Reviewing the layout before fabrication helps align the finished surface with the room.

What edge profiles and finishes are available for marble vanity tops?

Common marble edge choices include eased, rounded, and beveled profiles; finishes often include polished and honed. For marble bathroom countertops, a rounded edge can soften a vanity’s outline, while a crisp eased edge suits a simpler design. Review the profile alongside the slab and cabinet style before fabrication, since the edge affects the finished appearance and how the countertop thickness looks.

Can a marble vanity top be repaired if chipped or stained?

Some chips and stains can be treated, but the right approach depends on the damage and marble’s condition. A small edge chip, for example, differs from a stain that has penetrated the stone. Avoid abrasive cleaners and improvised repair products, which may worsen the surface. A stone professional can assess the affected area and recommend a suitable repair or cleaning approach.

A homeowner applies sealer to a naturally veined quartzite bathroom vanity in a Glen Allen home.

Quartzite Colors, Durability, Care and Sealing Needs

Yes, quartzite generally needs periodic sealing to help protect its porous surface from stains. Wipe spills promptly and avoid harsh or acidic cleaners. To understand what quartzite is, start with its geology: heat and pressure transform quartz-rich sandstone into a dense natural stone. This differs from engineered quartz, which combines mined quartz with resin and pigments. Quartzite’s minerals create natural colors and veining, so slabs range from calm, pale backgrounds to more expressive patterns. It can bring a refined look to a kitchen or bath and offer strong everyday durability, but no natural surface is maintenance-free. This article explains how quartzite’s composition shapes its appearance and performance, how it compares with quartz, and what routine care and sealing involve, helping you decide whether its character and upkeep suit your home.

Key Takeaways

  • Learn how mineral traces influence a slab’s color and pattern, and what to look for when choosing a finish that suits your space.
  • Understand how natural stone formation differs from engineered quartz, so you can compare the materials with greater confidence.
  • Get practical guidance on everyday care and the habits that help protect a stone countertop from stains and surface damage.
  • Consider how each material’s characteristics fit your home’s style, daily use, and maintenance preferences.

Natural quartzite colors and mineral impurities

Natural quartzite often appears white, cream, or gray, with veins and patches that add movement across a slab. Iron-bearing minerals can create pink, red, or rust-colored areas, while other mineral impurities may contribute green or darker markings. The mix and distribution of minerals shape each stone’s colors, so even slabs from the same collection can have distinct patterns.

Veining can appear as soft, cloudy bands or sharper lines across the surface. A pale background with gray veining may feel quiet, while brown or gold streaks create stronger contrast. Cutting also affects how these patterns appear: the slab’s direction and the placement of cut pieces determine which veins continue across a countertop. Reviewing the full slab helps you see how its grains and markings will look in your space.

The finish also changes the look. A polished surface reflects light and can make colors seem more pronounced; honed stone has a softer, less reflective appearance. A leathered finish adds tactile texture and highlights variation in the stone. These finishes change how light meets the surface, not the minerals that give the rock its color.

Natural quartz crystals show a broader range of colors than the mostly pale appearance associated with many quartzite slabs. Clear, white, smoky, pink, and purple crystals are examples; trace elements and formation conditions influence their color. Quartzite’s appearance reflects the rock as a whole and its mineral impurities, rather than a single crystal.

Some quartzite, including Cristallo varieties, can transmit light and suit backlit designs. Transparency depends on the particular stone and its structure. In gemstone-quality material, cutting can reveal translucence or emphasize color, while a countertop slab may show cloudy areas, visible grains, or veining. Viewing the actual piece in different lighting helps reveal its colors, clarity, and pattern before you choose it.

What is Difference Between Quartz and Quartzite?

Quartzite and quartz share a mineral name but describe different materials. Their formation and composition explain key differences between the countertop options.

Composition and Metamorphic Formation

Quartzite is a natural metamorphic rock composed mainly of interlocking quartz grains. Its name describes the rock; quartz names a mineral found within it. This distinction matters when comparing quarried stone with engineered quartz. Natural quartzite forms in the earth, while engineered quartz combines mined quartz with resin and pigments. The materials therefore differ in composition and how they are made.

Geological Origins

Quartzite begins as quartz-rich sandstone buried and exposed to intense heat and pressure. During metamorphism, its original grains recrystallize and fuse, forming dense stone. This process can change the rock’s texture without making it a manufactured surface. For countertop decisions, that origin explains why quartzite is natural stone and why individual slabs can differ.

Formation from Sandstone

Quartz-rich sandstone contains 90% to 99% quartz grains. As heat and pressure act on the buried rock, the grains recrystallize and bind together, creating quartzite. The sandstone’s original structure changes, but quartz remains central to the resulting stone. This formation process helps explain quartzite’s hardness and why its natural surface can be resistant to everyday wear.

Engineered quartz follows a different path: manufacturers combine crushed, mined quartz with resin and pigments. It is about 93% quartz, while quartzite is a natural stone formed underground. That difference affects the material’s character and care. Quartzite can withstand high temperatures, while resin in engineered quartz can be damaged by excessive heat. A cutting board and prompt spill cleanup help protect either surface during daily use.

Quartzite Colors, Durability, Care and Sealing Needs

Quartzite countertop durability and maintenance

Quartzite has a Mohs hardness of around 7, making it resistant to everyday scratches. Is quartzite harder than granite? Quartzite generally ranks higher in hardness, while both natural stones resist heat and everyday wear. Formed under heat and pressure, quartzite is dense, but countertops can still chip or dent from impact. Use a cutting board, and avoid striking exposed edges with cookware.

What are the pros and cons of quartzite countertops? Their strengths include natural patterns, high heat tolerance, and hardness. The tradeoffs are periodic sealing and care to limit stains, chips, and dents. Quartzite’s porous surface can absorb spills, so wipe them promptly. Sealing helps protect against staining, but it does not make the countertop immune to damage.

Quartz countertops have different care needs because they contain resin. They’re often more stain-resistant than quartzite, but less heat-resistant; repeated exposure to temperatures over 500 degrees Fahrenheit may cause heat damage. Excessive heat can damage quartz countertops. A cutting board also helps prevent knife scratches. For routine cleaning, wipe quartz with a damp cloth. These differences matter if you regularly set hot cookware or prepare food directly on the counter.

Quartzite can suit countertops, kitchen islands, bathroom vanities, and bar tops, but each application brings different exposure to spills, heat, and daily wear. A busy kitchen island, for example, needs prompt spill cleanup and attention to its seal. An outdoor kitchen requires a separate evaluation based on the stone’s performance, local climate, and intended use. If your outdoor living plans also encompass an adjacent swimming area, industry specialists like Rod Cameron Pools provide helpful guidance on what to expect during surface restoration and maintenance. Gem-quality quartzite and countertop slabs serve different purposes: a translucent gemstone cut for light is not automatically suited to a work surface. Choose according to how you’ll use the surface, the appearance you want, and the care it requires.

Quartz and quartzite composition

Quartz is a mineral; quartzite is a metamorphic rock made mostly from quartz. That difference explains why a quartz crystal and a quartzite slab have distinct textures, even though both contain the same mineral. Quartzite is composed of more than 90% quartz, while the remaining minerals can vary. Those differences influence the stone’s color, veining, and other visible characteristics.

Heat and pressure transform quartz-rich sandstone into quartzite. Its grains recrystallize and become tightly interlocked, creating the stone’s crystalline texture. Mineral impurities, such as iron oxide, can add color, while a purer quartz-rich composition may look more uniform. The mineral mix varies from piece to piece, helping explain why natural stone slabs rarely have identical patterns.

Quartz has a crystalline structure and a chemical composition distinct from the full rock. In quartzite, quartz crystals are part of a larger mineral arrangement rather than a single specimen. This matters when comparing a crystal’s clarity with a slab’s overall appearance: other minerals and the arrangement of grains affect the stone’s color and texture.

For gem-quality quartzite, measured characteristics include a density of 2.64 to 2.69, a refractive index of 1.544 to 1.553, and birefringence of 0.009. These values describe how gemstone material behaves with light and measurement. They don’t explain every countertop’s appearance, since mineral variety and grain structure also shape each slab.

Composition can help explain what you’re seeing: a pale field with darker veins may reflect differences in mineral content, not a surface coating. Compare the whole slab under consistent lighting, then consider how its pattern will fall across your planned countertop. This gives you a clearer sense of the stone’s natural characteristics before choosing a particular piece.

Absolute Stone Design: Quartz

Absolute Stone Design can help you compare quartzite and quartz when planning countertops in Richmond, Henrico, Glen Allen, Midlothian, or Chesterfield. When weighing natural stone’s distinctive patterns against engineered quartz’s composition, start with how you use the space, the look you want, and the care each surface needs.

The team handles the process from measuring through delivery and installation, with stone fabrication completed in-house. This connected approach carries your material choice through to the finished countertop. Granite is also available if you’re considering another natural stone for your project.

Contact Absolute Stone Design to discuss your countertop plans.

Choose a Surface That Fits Your Home

Understanding what quartzite is gives you a helpful starting point. Next, picture how the surface will work with the room’s lighting, cabinetry, and daily routines. A striking slab may look different beside your existing finishes, so consider the whole space as you shape your plans.

Absolute Stone Design offers quartzite, quartz, granite, and marble countertops for projects in Richmond, Henrico, Glen Allen, Midlothian, and Chesterfield. The team can help you think through your design direction and which material suits your needs. Bring your priorities, from the look you want to how you use the room, into the conversation.

Ready to take the next step? Contact Absolute Stone Design to discuss your countertop plans and move your project forward with confidence.

Frequently Asked Questions

Does quartzite need to be sealed?

Yes. Sealing is part of caring for a quartzite surface, but it should not be treated as a one-time finish. Before applying sealer, make sure the countertop is clean and dry, and choose a product intended for natural stone. Follow its label directions, including guidance on application and curing, to avoid affecting the finish.

Where Does Quartzite Come From?

Quartzite is quarried from natural deposits found in several countries, including the United States. In the U.S., deposits occur in the Appalachian Mountains, which extend through 13 states. That broad geological region means domestic quartzite can come from different locations, with natural variation from deposit to deposit. The origin may help explain why slabs vary in appearance, even within a similar color family.

What is quartzite and how does it form?

Quartzite is a natural metamorphic rock formed from quartz-rich sandstone. One useful way to understand its classification is through the British Geological Survey’s standard: a metamorphic rock is quartzite when it contains at least 80% quartz by volume. This threshold distinguishes quartzite from some quartz-rich rocks that may look similar but have a different geological identity.

How can you tell quartzite from marble or quartz?

Color and veining alone cannot reliably identify a slab, since quartzite and marble can look alike. For a renovation, use the material identification provided with the stone rather than relying only on a sample’s appearance. Compare the full slab with the selected sample, too, since natural patterns can vary. Clear material identification helps you match care expectations to the surface you choose.

Is quartzite heat-resistant and scratch-resistant?

Yes, quartzite resists heat and everyday scratching, but it is not immune to every kitchen hazard. Avoid sliding gritty cookware or small appliances across the surface, since trapped particles can abrade the finish. Place hot cookware carefully rather than dropping it onto the countertop. These habits help preserve the polished appearance without treating the stone as damage-proof.

Does quartzite need to be sealed, and how often?

Yes, but no single calendar interval suits every quartzite countertop. Follow the sealer’s care directions and note the product and application date so you can plan maintenance consistently. A sink area may encounter water more often than a lightly used counter section. Differences in use can affect when resealing is needed.

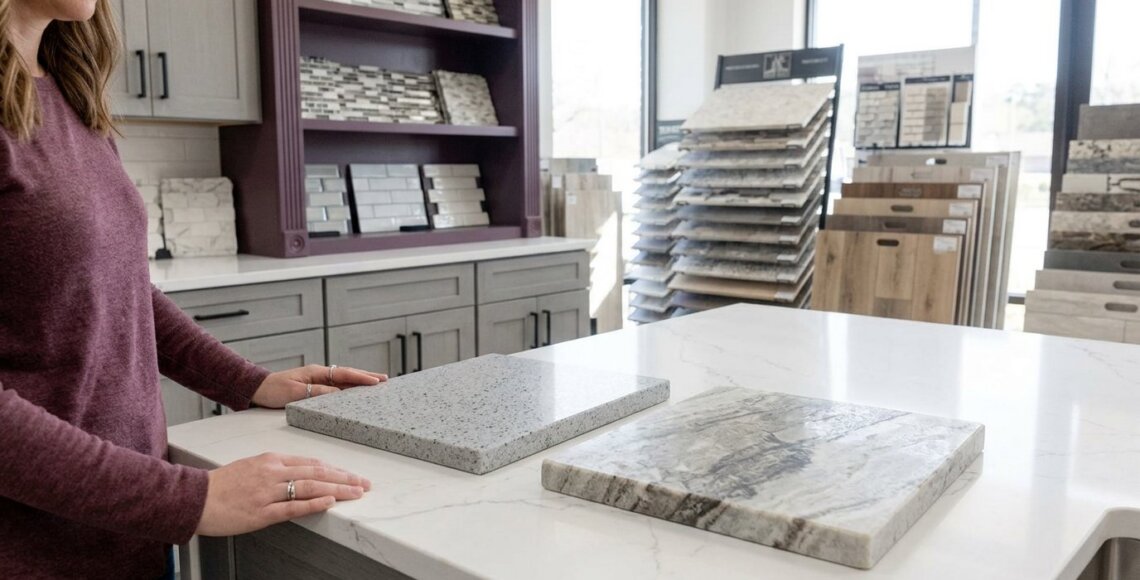
A homeowner compares engineered quartz and naturally veined quartzite countertop samples in a Richmond showroom.

Quartz vs Quartzite: Which Countertop Should You Choose

The most natural-looking countertop isn’t always the one that asks the most of your care routine. In the quartz vs quartzite decision, quartz is an engineered surface that generally doesn’t need sealing, while natural quartzite needs periodic sealing to help resist stains.

Both can bring lasting beauty to a kitchen or bathroom. The right fit depends on what matters most in your home: a more consistent appearance and simpler upkeep, or the natural veining and variation of stone. Weigh everyday care alongside the look you want, especially for a busy kitchen.

Learn how the materials are made, how their appearance and everyday care differ, and what quartzite sealing involves, including how to tell when it may be time to reseal. These practical details can help you choose a countertop that suits your space and routine.

Key Takeaways

  • Choose based on the look and upkeep you prefer: engineered quartz has a more consistent appearance, while natural quartzite has distinctive veining and variation.
  • Understand how each surface responds to heat so you can build practical habits around cooking and countertop care.
  • Quartzite needs periodic sealing, and a simple water test can help indicate when it’s time to reseal.
  • Learn how each material is made to better understand the differences you’ll see in your finished countertop.

Quartz vs Quartzite: What’s the Difference and Which Should You Choose?

Quartz is an engineered countertop material made with crushed quartz, resin, and pigments; quartzite is natural stone formed from sandstone. That difference affects appearance and care: quartz usually has more consistent patterns and generally doesn’t need sealing, while quartzite has natural variation and needs periodic sealing to help resist stains. Both can suit a kitchen, but their upkeep differs.

What are the pros and cons of quartz versus quartzite countertops? Quartz offers a consistent look and simpler care, but hot cookware can damage its resin, so use a trivet. Quartzite offers natural veining and greater heat tolerance, but its porous surface needs sealing and prompt spill cleanup.

Which countertop is easier to maintain and repair? Quartz is usually simpler to maintain because it generally doesn’t need sealing. Repair depends on the type and location of damage. Matching a repair to quartzite’s natural veining can be challenging, while quartz’s more consistent patterns may make visual coordination easier.

How can you tell genuine quartzite from mislabeled or soft quartzite? Apply lemon juice to a sample or offcut for several minutes; true quartzite shouldn’t develop an etched, dull spot from acid. Don’t test an installed countertop, since another material could be damaged.

Countertop Appearance Care Kitchen consideration
Quartz More consistent engineered patterns Generally no sealing Protect from hot pans with a trivet
Quartzite Natural veining and variation Periodic sealing; clean spills promptly More heat-tolerant, but porous

Choose quartz if consistent patterns and simpler maintenance fit your priorities. Choose quartzite if you prefer natural variation and are comfortable with sealing and prompt cleanup. Before deciding, consider where the countertop will go, how you use that area, and which surface’s care needs feel manageable for your household.

Quartzite vs Quartz: What are Quartzite Countertops?

Quartzite begins as sandstone, then forms under heat and pressure over millions of years. Its natural colors and veining vary from slab to slab, unlike the more consistent patterns often found in engineered quartz. That natural character is part of its appeal, but the surface also needs care suited to natural stone.

Which is harder and more durable, quartz or quartzite? Quartzite generally ranks between 7 and 8 on the Mohs hardness scale, while quartz rates around 7. Both resist everyday scratches, but quartzite is harder; granite also stands up well to scratches, heat, and general wear. Marble is softer than quartzite and more likely to scratch.

How resistant are quartz and quartzite to stains, scratches, heat, and UV light? Quartz resists stains without sealing and handles everyday scratches, but its resin can be damaged by high heat. Porous quartzite can stain if spills penetrate, yet it offers strong scratch and heat resistance. Some quartzite contains resin that may fade in UV exposure, so resin-containing slabs aren’t suited to outdoor use.

Heat tolerance matters beside a range or on a kitchen island. Quartzite tolerates heat better than engineered quartz, whose resin can be damaged by hot cookware. Granite also resists heat, but using a protective trivet is sensible with any countertop. According to Cambria, use a closed-weave hot pad or solid trivet to protect quartz and quartzite surfaces.

Quartzite’s hardness doesn’t make it immune to damage. A sharp impact can still chip a countertop edge, and acidic foods can affect some natural stones. Wipe up lemon juice promptly, for example, and use a cutting board instead of cutting directly on either surface.

For a material choice that balances natural veining with everyday kitchen routines, explore quartzite countertop options and consider how heat, spills, and sunlight affect your space.

Quartz vs Quartzite: Which Countertop Should You Choose

Does quartzite require sealing and how often?

Yes. Quartzite is porous, so liquids can enter the stone and leave stains; sealing adds protection but doesn’t make the countertop stain-proof. Sandstone transforms under heat and pressure to form quartzite, and differences between slabs and finishes affect how readily each surface absorbs moisture. That’s why sealing needs can vary, even for a premium countertop material.

Resealing guidance varies: quartzite countertops generally need resealing one to two times per year, while another typical interval is once every one to three years, depending on the stone and its use. These are different recommendations, not one schedule for every slab. A polished finish, daily cooking, and frequent spills can all affect maintenance needs.

Use a water test to judge whether the sealer is still working. Place a few drops of water on the countertop and watch what happens. If the water absorbs within a few minutes instead of beading, resealing is needed. If it beads, the seal remains effective at that spot; repeat the test elsewhere, since wear may differ across the counter.

For daily cleaning, wipe spills promptly and choose a natural-stone-safe or pH-balanced cleaner. Lemon juice and vinegar can etch some stone surfaces, so clean them up quickly rather than letting them sit. For a fresh spill, start with water and mild dish detergent, then rinse and dry the area.

Sealing helps reduce staining, but routine care still matters. Coffee left on a porous section can penetrate despite a sealer, while a promptly wiped spill is less likely to linger. Avoid harsh, acidic cleaners, which can affect the surface or sealer. Follow the care directions for your countertop, and repeat the water test if absorption suggests protection has weakened.

How engineered quartz and natural quartzite are made

Engineered quartz countertops are made by combining ground natural quartz aggregate with resin and pigments, then forming the mixture into slabs. Many engineered surfaces contain about 90 to 95 percent quartz aggregate; the rest includes resin and colorants. This process lets manufacturers create patterns with a more consistent appearance than natural stone. For example, repeated slabs can offer similar color and veining across a kitchen.

Natural quartzite forms when sandstone undergoes heat and pressure over millions of years. The pressure transforms the original rock into a hard, quartz-rich natural stone. Its composition and color depend on the minerals present as the sandstone forms. Quartzite slabs are typically more than 90 percent quartzite, and some can reach 99 percent. Each slab develops its own pattern rather than following a manufactured design.

The distinction between quartz and quartzite is clear in their patterns. Engineered quartz can offer repeatable colors and visual movement, which helps when coordinating multiple countertop areas. Natural quartzite has veins and color variation shaped by its geological formation. Even slabs sold under the same stone name can look different, so a large kitchen may show noticeable variation between pieces or seams.

Production also influences everyday care. The resin in engineered quartz helps create a nonporous surface that resists stains without sealing, while quartzite’s natural pores can absorb spills and benefit from stone sealing. Pigments and resins give engineered surfaces their selected appearance, but high heat can damage the resin. Quartzite’s natural composition tolerates heat better, though its veining and slab-to-slab differences call for thoughtful layout planning. To compare how these materials may look across your kitchen, explore quartz and quartzite countertop options before choosing a surface.

Absolute Stone Design: Quartz

Absolute Stone Design serves homeowners in Richmond and nearby communities with quartz and quartzite countertops, helping you choose between a consistent engineered pattern and the natural variation of stone. The team can help you consider how each material’s appearance and care needs fit your kitchen. Granite is another option to compare if you’re considering natural stone.

Once you’ve chosen a direction, Absolute Stone Design handles measuring, fabrication, delivery, and countertop installation for homes in the Richmond area. The team can help translate your material choice into a surface tailored to your space, including the kitchen layout and details that shape the finished look.

For help planning a quartz or quartzite countertop in Richmond or a nearby community, contact Absolute Stone Design.

Plan a countertop that fits your home

In the quartz vs. quartzite decision, picture the surface in its finished setting. Consider how its colors will work with your cabinets, backsplash, flooring, and natural light. Viewing a sample beside those elements can help you decide whether the overall look feels calm, coordinated, or more expressive.

Think, too, about the routines around the counter. A busy cooking area, a frequently used island, or a bathroom vanity may each call for different priorities. The Absolute Stone Design team can help connect your design goals with a practical countertop selection. If you’re also weighing natural-stone alternatives, the company offers granite and marble countertops.

Give yourself room to consider the full design, not just the slab on its own. The right choice should feel at home in your space and suit the way you use it. Contact Absolute Stone Design to talk through your countertop plans and explore service for your Richmond-area project, then take the next step with confidence.

Frequently Asked Questions

What does quartzite look like compared to quartz?

Quartzite’s appearance can shift noticeably from one slab to another, while quartz offers more predictable patterning. If you’re planning several countertop runs, look at the actual slabs and consider how their visual movement will carry across the room. A small sample may not show the full pattern, so assess the larger surface before deciding how it fits your design.

How do you plan quartzite seams in a large kitchen?

Plan seam locations as part of the kitchen layout, especially where long runs meet an island or turn a corner. Natural veining may not line up across separate pieces, so seam placement can affect how continuous the surface appears. Considering the overall pattern before fabrication helps you decide which areas should draw attention.

Is Quartz or Quartzite Better for Your Kitchen?

Choose according to the kitchen’s design priorities and your care preferences. If you want a coordinated look across separate work areas, consider how closely the selected surface can match from one run to another. If the countertop is a focal point, decide whether you prefer a uniform pattern or the distinct character of natural stone. Your routine matters, too.

What should you compare when viewing countertop samples?

Look at color, pattern, and how the surface relates to fixed elements such as cabinet fronts and flooring. For a kitchen with perimeter counters and an island, consider whether you want the surfaces to coordinate closely or create contrast. Reviewing the material in the context of your design can make the choice more intentional.

Quartz vs. Quartzite vs. Granite: Which is Best?

There isn’t one best surface for every kitchen. Think about whether you prefer engineered consistency or natural variation, then weigh the care each material requires. Granite adds another natural-stone option to compare. Narrow your choices by considering the look you want across the full countertop layout, rather than judging a small section in isolation.

What is the difference between quartz and quartzite countertops?

The key distinction is how each countertop material is made: quartz is engineered, while quartzite forms naturally. That difference can guide design decisions, particularly when matching surfaces across several areas. For instance, a homeowner coordinating a long counter and an island may prioritize a predictable pattern, while someone seeking a one-of-a-kind focal surface may prefer natural variation.

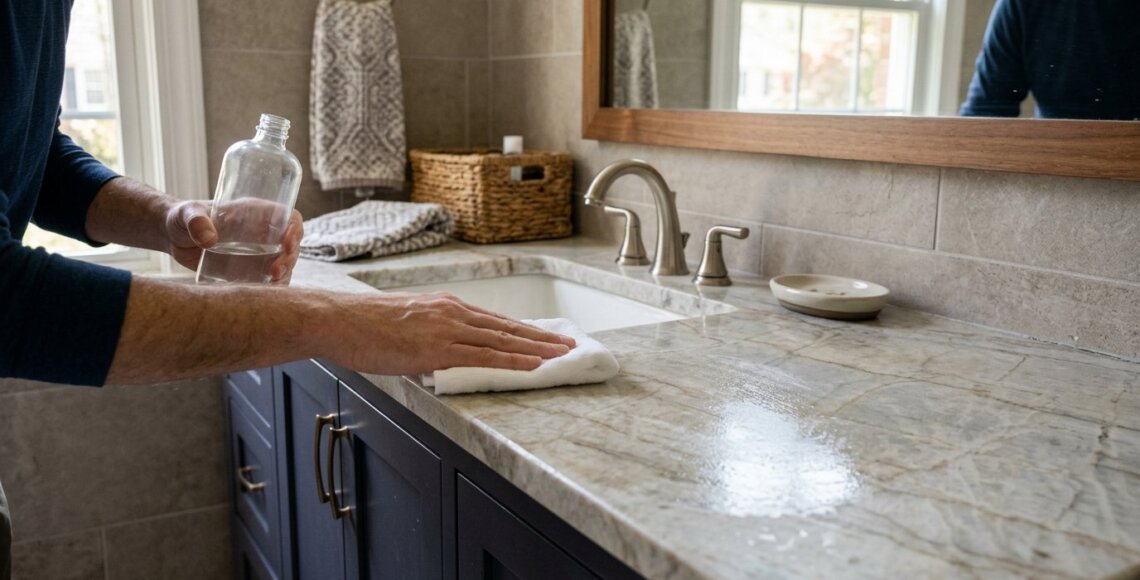
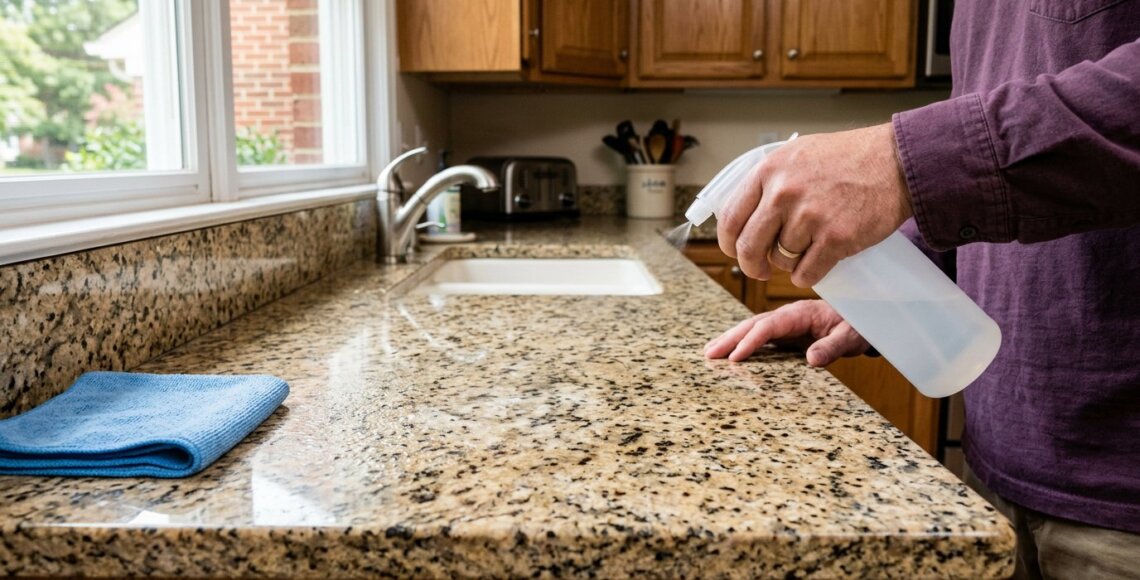
A homeowner applies alcohol to disinfect a speckled granite kitchen countertop in Glen Allen.

How to Clean Granite Countertops Safely and Disinfect Them

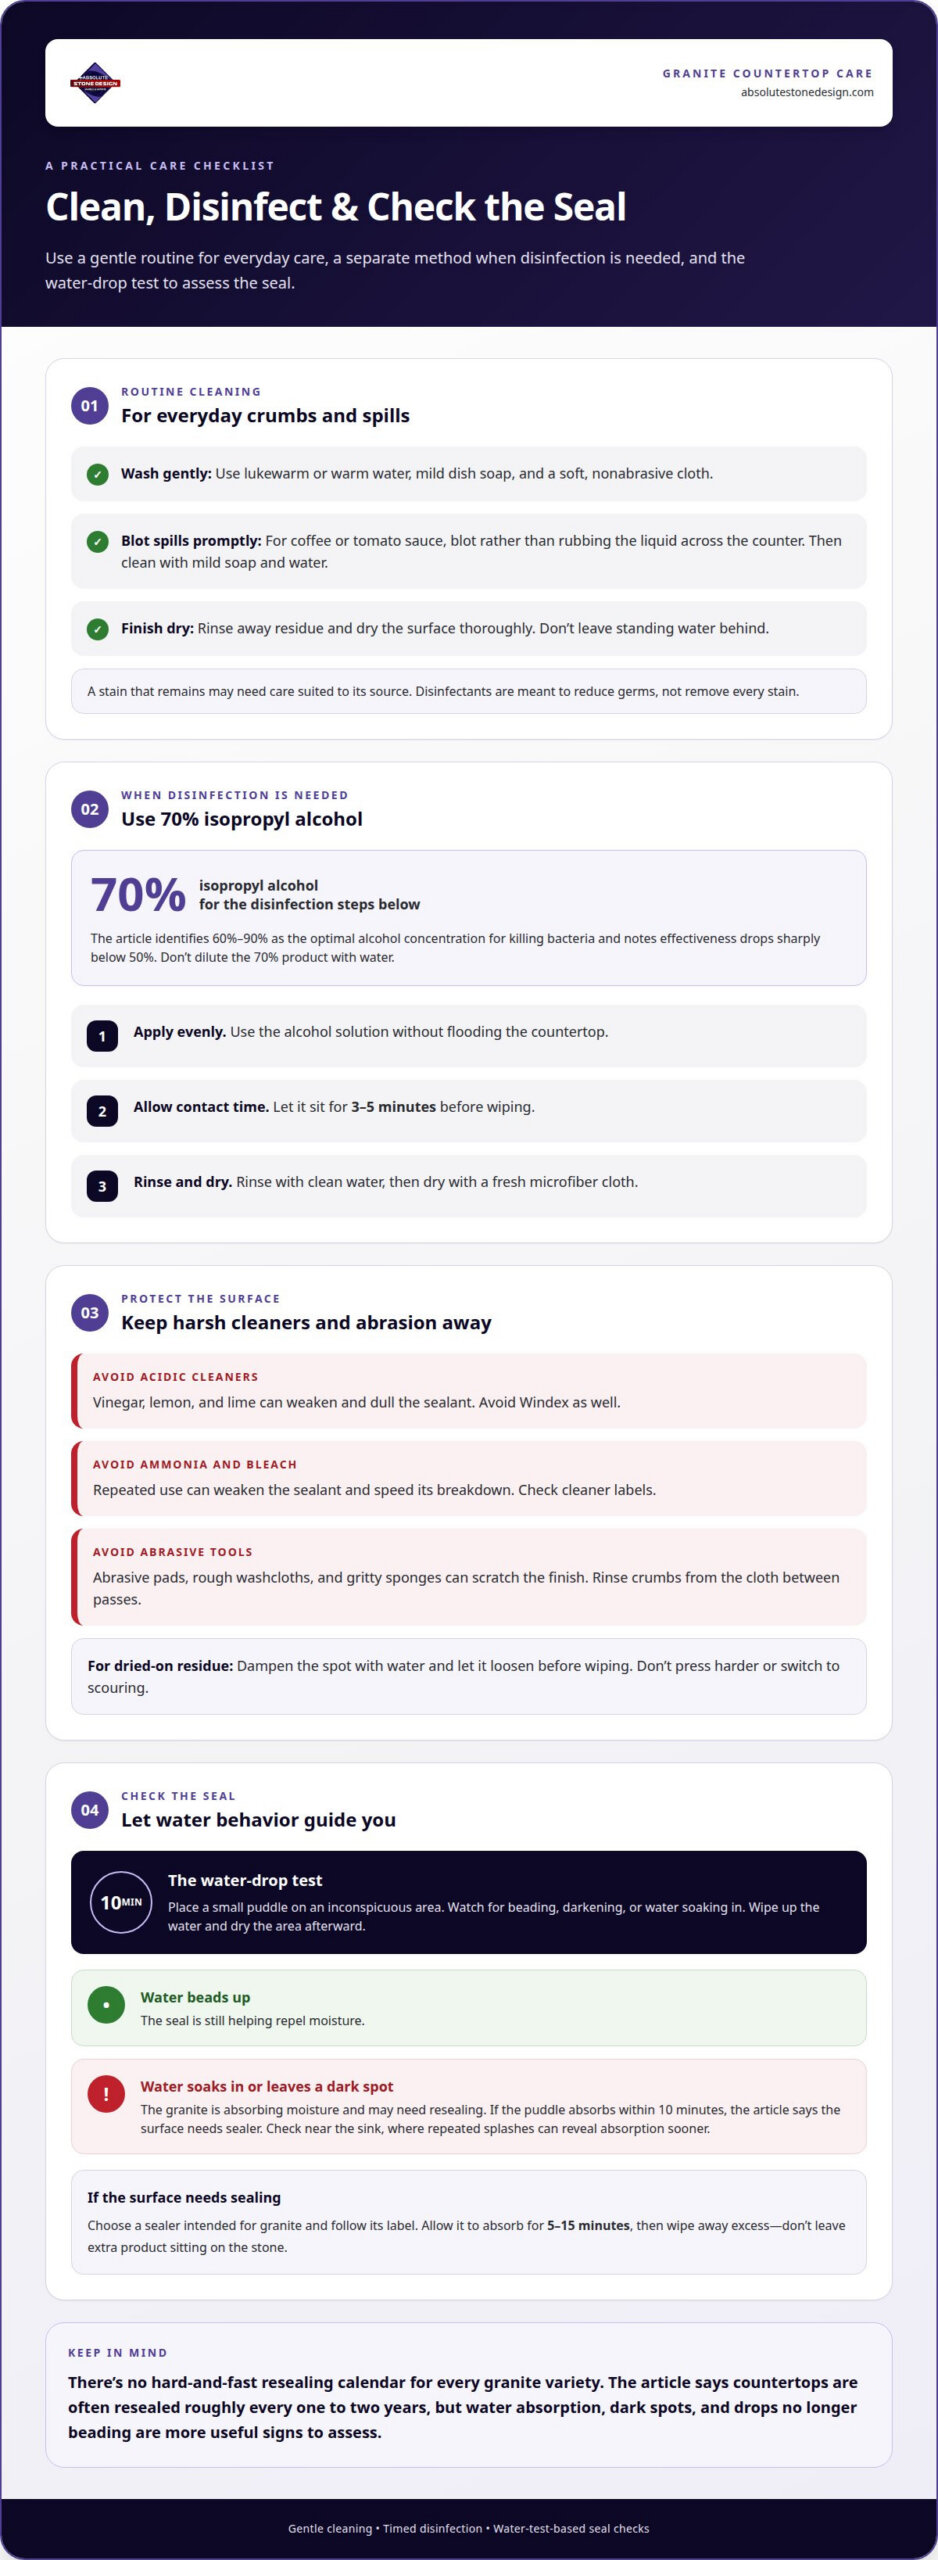
For everyday cleaning granite countertops, use lukewarm water, mild dish soap, and a soft cloth, then dry the surface thoroughly; to disinfect, apply 70% isopropyl alcohol, let it sit for 3 to 5 minutes, rinse with water, and dry with a clean microfiber cloth. Routine cleaning and disinfection are different tasks, and choosing gentle products helps protect the granite’s sealant: acidic cleaners such as vinegar and lemon, products containing ammonia or bleach, and abrasive sponges can dull or damage the surface over time. You’ll learn how to clean up spills, choose a suitable cleaner, disinfect when needed, and spot signs that your countertop may need attention, so daily care feels straightforward and your stone stays ready for the next meal, gathering, or quiet morning at home.

Key Takeaways

  • Use a water-drop test to see whether your granite may need resealing, and watch for signs that moisture is soaking in.
  • For disinfection, choose an appropriate alcohol solution and follow the recommended contact time before rinsing and drying.
  • Protect the sealant by avoiding acidic or harsh cleaners and choosing soft cloths over abrasive sponges.
  • Clean spills promptly, use mild dish soap for routine care, and dry the surface instead of leaving standing water.

Should You Use a Special Granite-Safe Cleaner?

  1. Start by testing the seal, because cleaner choice alone can’t protect stone that absorbs spills. Place a small puddle of water on an inconspicuous part of the granite surface. Watch for darkening or water soaking in. If the stone absorbs the puddle within 10 minutes, it needs sealer. Unsealed granite can absorb spills, oils, and stains, so wipe up the test water and dry the area afterward.
  2. Use water’s behavior as a sign of whether the surface is sealed. If drops bead up, the seal is still helping repel moisture. If water soaks in or leaves a dark spot, the granite is absorbing moisture and may need resealing. Check near the sink, where repeated splashes can reveal absorption sooner. Granite is less porous than marble, but its seal still needs attention.
  3. Let the test guide your timing instead of relying on a fixed calendar. Granite countertops are often resealed roughly every one to two years, but there’s no hard-and-fast rule for every variety. If a water puddle hasn’t soaked in after 10 minutes, the stone may need only a mild sealer or none. Recheck when water stops beading or dark spots appear.
  4. If the surface needs sealing, choose a sealer intended for granite and follow its label. Allow the sealer to absorb for 5 to 15 minutes before wiping away excess. Don’t leave extra product sitting on the stone. Once the surface is sealed, routine cleaning usually calls for a mild approach rather than a specialized cleaner. A granite-safe cleaner can be useful, but a suitable product won’t replace sealing when water absorbs into the stone.

Use the water-drop test as a practical guide rather than relying on a fixed calendar interval: water that soaks into the surface indicates the granite may need sealing. If drops no longer bead up, assess the countertop for resealing. These signs help you evaluate the surface instead of assuming every stone behaves alike.

Dark spots around a granite countertop sink can indicate that the granite is absorbing water and needs resealing. There is no hard-and-fast rule that every variety of granite must be resealed every 1-3 years, so the visible response to water is more useful than a universal schedule. Consider the test results together with changes in beading and any darkening, then base sealing decisions on those signs.

Disinfecting granite countertops

  1. For a fresh stain, blot the spill promptly with a soft cloth rather than scrubbing. Clean the area with warm water and mild dish soap, then dry it thoroughly. Tomato sauce and coffee can stain granite. Disinfectants are intended to reduce germs, not remove every stain. A mark that remains may need care suited to its source.
  2. Choose 70% isopropyl alcohol when you need to disinfect a granite surface. Apply it evenly, without flooding the counter, and let it sit for 3 to 5 minutes before wiping. Rinse the surface with clean water, then dry it with a fresh microfiber cloth. This sequence limits lingering residue while giving the solution time to work.
  3. Check the concentration before applying alcohol. According to the Centers for Disease Control and Prevention, alcohol’s effectiveness at killing germs drops sharply below 50% concentration. The Centers for Disease Control and Prevention identifies 60% to 90% as the optimal alcohol concentration for killing bacteria. A 70% isopropyl alcohol product falls within that range; don’t dilute it with water.
  4. Keep vinegar and other acidic cleaners away from granite, even if they seem useful for stains. They can weaken the sealant, while abrasive scrubbing may damage the finish. Granite is less porous than marble, but its seal still matters: moisture can enter through an unsealed or worn area. If a mark remains after gentle cleaning, don’t switch to harsher chemicals.
  5. Use disinfection when the counter needs more than routine washing, such as after handling raw ingredients. For everyday crumbs or spills, mild soap and water are often the gentler choice. If you’re planning a new surface, explore granite countertop options as part of your kitchen design.

How to Clean Granite Countertops Safely and Disinfect Them

Avoiding harsh and abrasive cleaners

  1. Prevent damage by using a soft cloth and a gentle cleaner for routine care. Abrasive pads and rough washcloths can scratch granite, especially if grit gets trapped beneath them. For dried-on residue, dampen the spot with water and let it loosen before wiping. Don’t press harder or use a scouring pad to remove stubborn marks.
  2. Keep acidic cleaners, including vinegar, lemon, and lime, away from the countertop. Frequent use can weaken and dull the sealant, leaving the surface less protected. Avoid Windex as well. For a tomato sauce spill, blot first, then clean with mild dish soap and water.
  3. Read cleaner labels and avoid products containing ammonia or bleach. Repeated use can weaken the sealant and speed its breakdown. A product that removes grease from another household surface may be too harsh for granite. Choose a mild cleaner instead, and wipe away residue rather than letting it dry on the surface.
  4. Use a clean, nonabrasive cloth for each pass, especially after food preparation. A gritty sponge can drag particles across the surface and leave scratches. Rinse the cloth as it collects crumbs, then wipe again with clean water. This helps prevent debris from turning routine cleaning into abrasive scrubbing.
  5. Clean spills promptly, particularly coffee and tomato sauce, which can stain granite. Blot instead of rubbing liquid across a wider area, then wash with mild dish soap and water. If a mark remains, don’t reach for vinegar, bleach, or abrasive powder. Harsh liquids can dull the sealant, while scrubbing can scratch the finish.

Keep the cleaning approach consistent: use a gentle cloth rather than an abrasive sponge or washcloth, since these materials can potentially scratch granite countertops. Even when wiping away residue, avoid letting the cleaning tool itself add abrasion to the surface.

Choose cleaning products carefully. Harsh liquids can weaken and dull the sealant, and repeated use can speed its breakdown. Avoid acidic cleaners such as vinegar, lemon, and lime, as well as Windex and products containing ammonia or bleach. A mild cleaner is a gentler choice for granite.

Granite countertop cleaning do’s and don’ts

  1. For routine cleaning, mix lukewarm water with mild dish detergent, then wipe with a soft washcloth. Work in small sections to pick up crumbs and residue instead of spreading them across the counter. Don’t flood the granite with water. Standing moisture can enter areas where the seal has worn, so use a damp cloth rather than pouring water onto the surface.
  2. Dry each cleaned section thoroughly with a soft, clean cloth. This removes moisture and soap film that can leave a polished surface streaky. Pay extra attention around the sink, where splashes can collect. If the cloth becomes wet or gritty, rinse it before wiping again so debris doesn’t drag across the stone.
  3. Blot acidic food spills promptly, including tomato sauce and coffee. These spills can stain granite, especially if they sit on an area with a weakened seal. Lift the liquid with a clean cloth, then wash the spot with mild dish detergent and water. Avoid scrubbing hard with a sponge; abrasive surfaces can scratch the finish.
  4. Keep acidic cleaners such as vinegar and lemon away from granite, along with products containing bleach or ammonia. Frequent use can weaken and dull the sealant. Use a mild cleaner for everyday messes instead. If a spill leaves a mark, don’t assume a harsher chemical will remove it safely; avoid abrasive powders and pads.
  5. Protect the counter while cooking by placing hot cookware on a trivet or wire rack, not directly on granite. Direct contact with hot items can leave marks or cause damage. Use a protective coaster for glasses, particularly near the sink or other spots where moisture often gathers. These habits help reduce avoidable wear between cleanings.
  6. For a kitchen update, explore granite countertop options that suit your space and daily routine.

Absolute Stone Design: Countertops

For Richmond-area homeowners planning a kitchen update or choosing a new countertop, Absolute Stone Design provides precision measuring, in-house stone fabrication, delivery, and countertop installation. The team helps connect material selection with the finished surface in your home.

If you’re considering granite, marble, or quartz, the right choice depends on the look you want and how you use your kitchen. Discuss your layout and material preferences with Absolute Stone Design to explore a countertop suited to your space.

Have a countertop project in mind? Contact Absolute Stone Design to start planning.

Keep Your Countertop Ready for Everyday Life

A thoughtful routine for cleaning granite countertops helps keep your kitchen ready for everything from quick breakfasts to shared meals. When you’re ready for a kitchen refresh, material and design choices can be tailored to your space. Absolute Stone Design offers granite and marble countertops among its natural stone options. The team handles material selection, fabrication, and installation, connecting your chosen design with the finished surface in your home.

You don’t need to plan every detail at once. Start with the change that matters most, whether updating a worn counter or choosing a stone for a new kitchen. A conversation with Absolute Stone Design can help you explore the next step at your pace.

Contact Absolute Stone Design to discuss your countertop plans and begin shaping a space that feels right for you.

Frequently Asked Questions

Is Granite Capable of Harboring Bacteria?

Yes, bacteria can remain on granite if food residue or other contamination is left on the surface. A sealed finish doesn’t replace regular cleaning after food preparation, especially after handling raw ingredients. Remove residue with an appropriate cleaner and a clean cloth, then disinfect when needed. Keeping the counter free of crumbs and spills helps prevent food debris from lingering between meals.

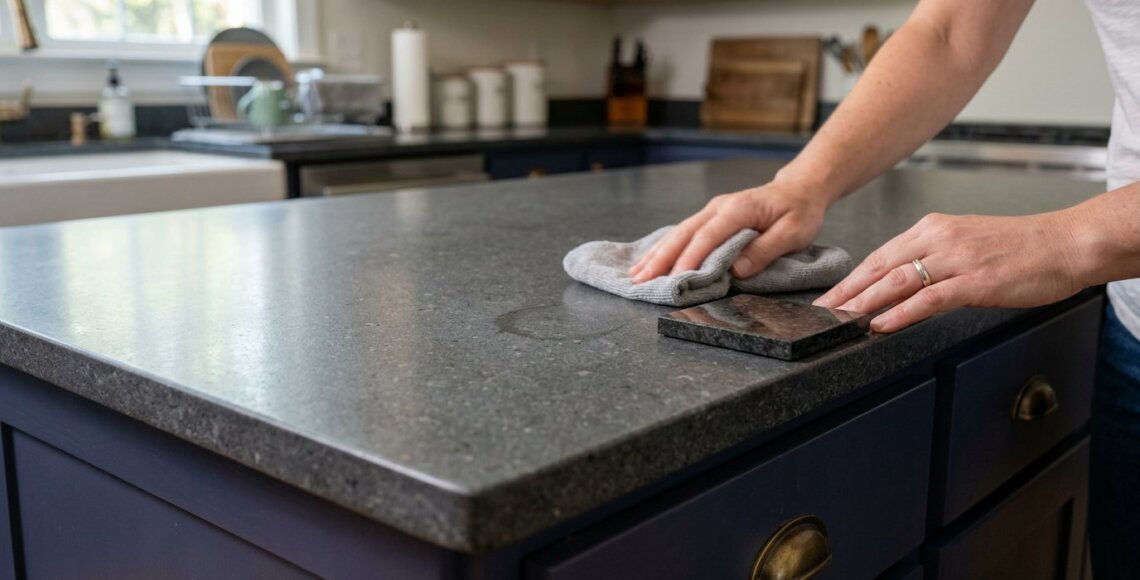
A homeowner wipes a water spot from a honed granite island beside a glossy sample of the same stone.

Honed or Polished Granite: Which Finish Fits Your Kitchen

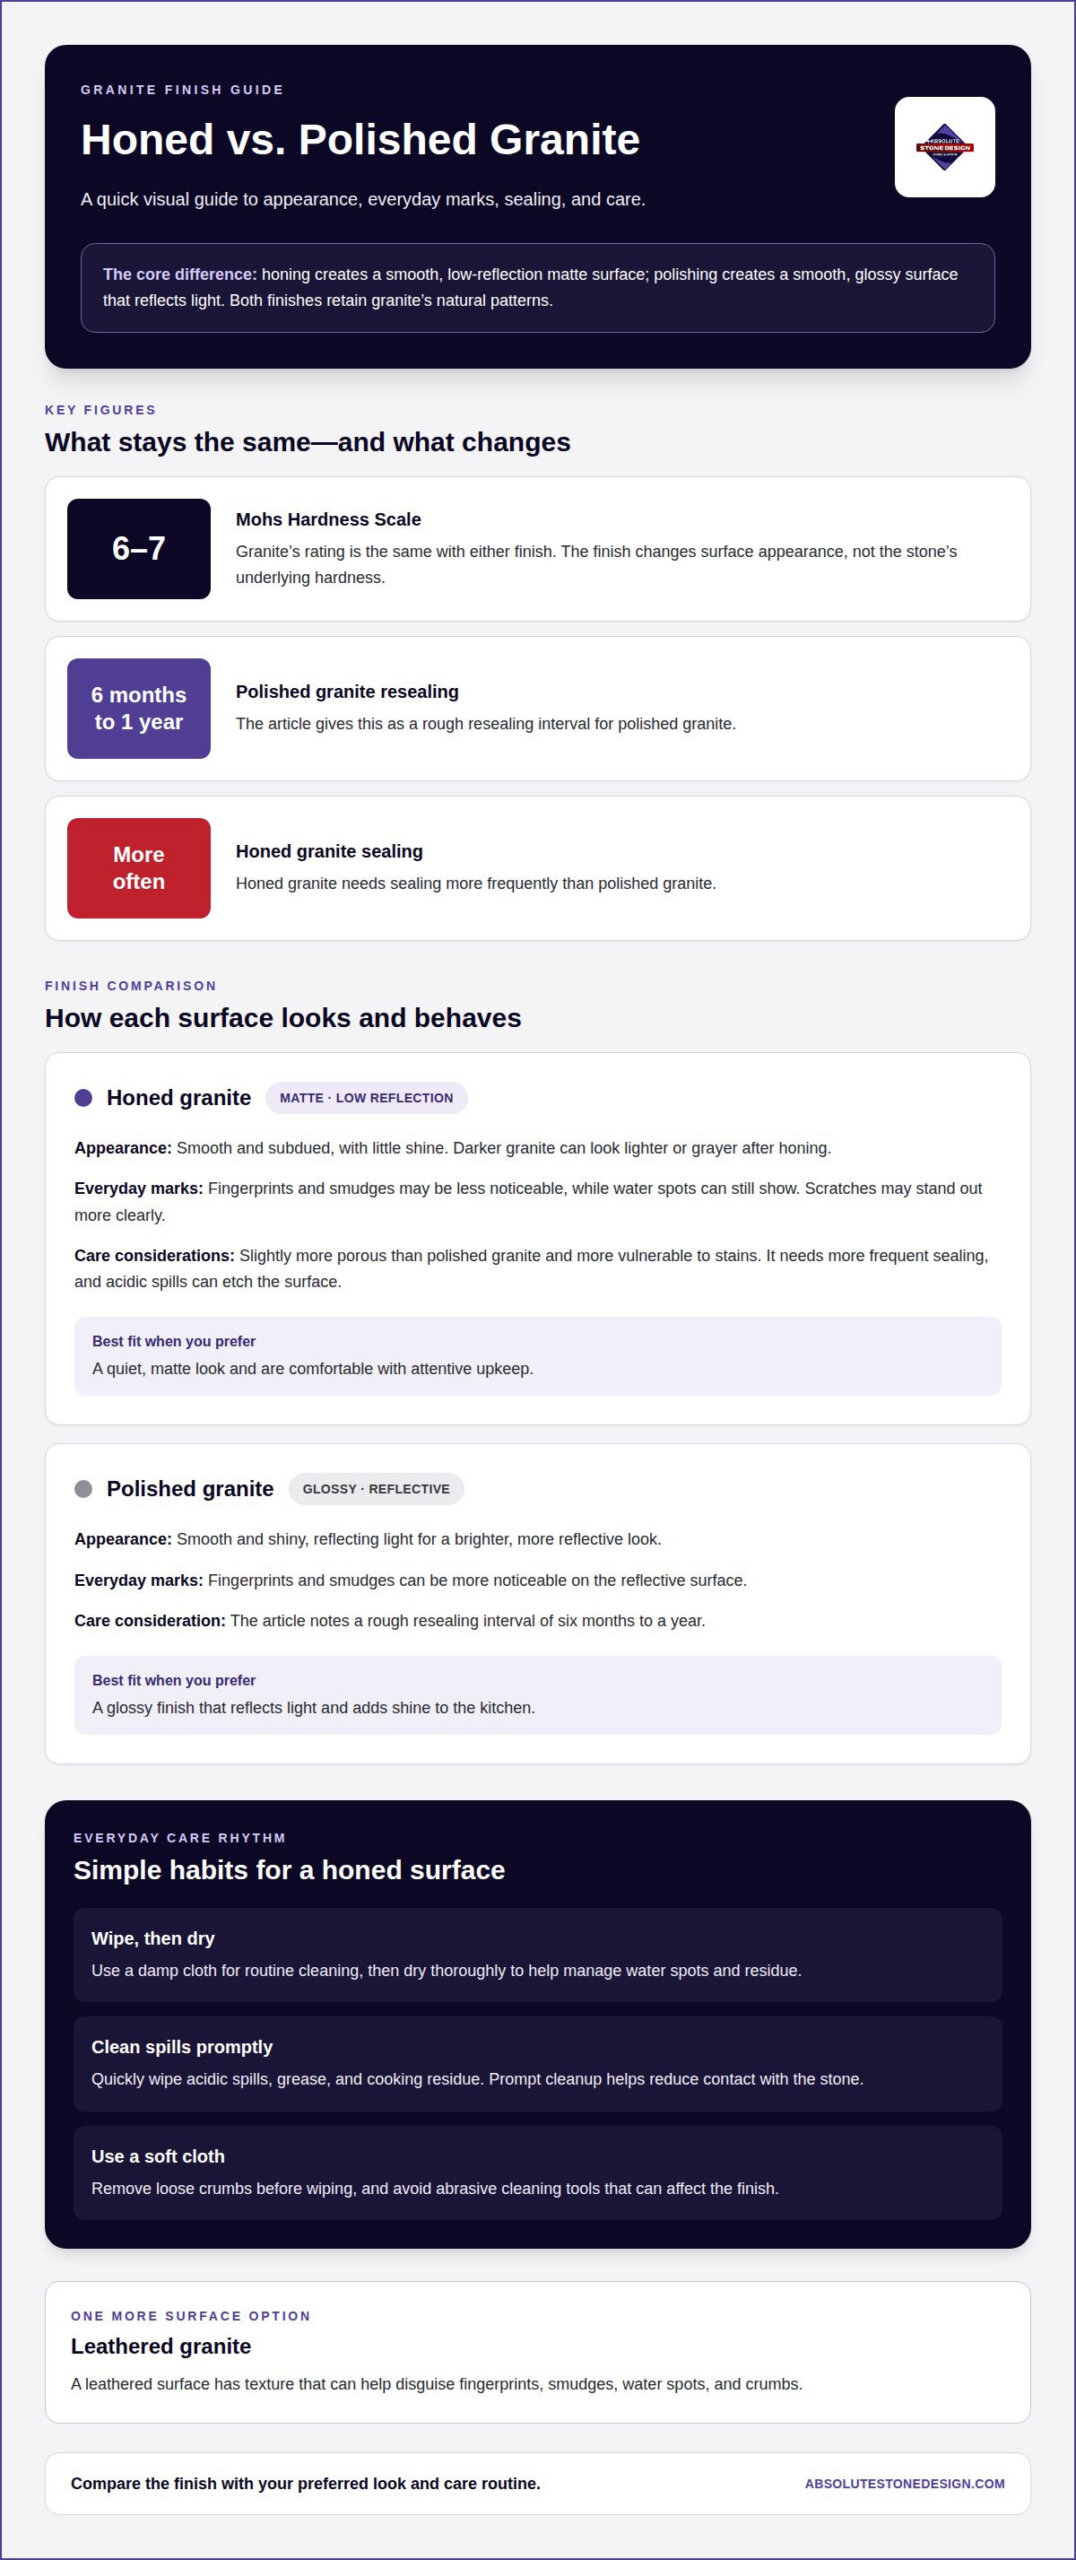
Honed granite countertops have a smooth, matte surface rather than the glossy shine of polished granite. That understated look comes with a practical consideration: honed stone may be slightly more porous and vulnerable to staining. Both finishes showcase natural stone character, so the right choice depends on your preferred look and how you approach everyday care.

A nonreflective finish can make fingerprints less conspicuous, but water spots and smudges may still show. Regular wiping and thorough drying matter. Honed granite also needs attentive sealing, while acidic spills can etch the surface. Polished granite’s shine creates a different look and maintenance experience.

This guide compares the finishes for appearance, fingerprints, upkeep, stains, and etching, helping you picture how each could work in your kitchen and choose with confidence.

Key Takeaways

  • Compare the soft, matte look of honed granite with polished granite’s reflective finish to see which better suits your kitchen’s style.
  • Consider your cleaning routine: a muted surface may disguise some fingerprints, but water spots and smudges can still call for regular wiping.
  • Learn how sealing, quick spill cleanup, and care around acidic foods can help manage honed granite’s vulnerability to stains and etching.
  • Use your kitchen’s look and everyday demands to guide your finish choice, then explore how granite countertop design and installation can bring the plan together.

What Is Honed Granite?

Honed granite is natural stone ground with coarse abrasives, stopping before the surface is polished. Colors and patterns vary by slab, and darker granite can look lighter or grayer with a honed finish.

Smooth Matte Appearance

The surface feels smooth, with little shine or reflection. This matte appearance sets honed granite apart from polished granite, whose glossy finish reflects light. Across a large countertop, honed granite looks subdued, while polished granite can appear brighter and more reflective. Both finishes retain the stone’s natural patterns.

Decor Compatibility

Honed granite suits decor built around understated surfaces, such as kitchens with wood cabinets, simple hardware, or soft, muted colors. Its low-sheen appearance lets the stone’s natural pattern add interest without a glossy focal point. Polished granite may better suit a kitchen designed around shine and contrast. Since darker granite can look grayer after honing, consider how the finish will look beside your cabinets and backsplash.

Granite’s natural variety means each slab has its own color and pattern. A honed finish changes the surface appearance, not the underlying pattern, so veins, flecks, and color variation remain part of the stone’s character. Compare the slab with nearby kitchen materials to see how the pattern and finish work together.

Finish Appearance Surface
Honed Matte, subdued Smooth, low reflection
Polished Glossy, reflective Smooth, shiny

Choose honed for a quieter, matte look; choose polished if you prefer a glossy, light-reflecting surface.

Choosing a finish based on lifestyle and maintenance

Your kitchen routine can help settle the choice. Honed granite suits homeowners who prefer a low-sheen surface and are comfortable with regular care. Polished granite has a glossy finish, but its reflective surface can make fingerprints and smudges more noticeable.

Honed granite’s advantages include a muted look and fingerprints that may be less apparent. Trade-offs include more frequent sealing than polished granite and greater vulnerability to staining and etching. Clean up acidic spills promptly, and remember that scratches may show more clearly on a honed surface.

Before choosing honed granite for a kitchen countertop, consider whether you’ll maintain the sealant and wipe spills promptly. Polished granite should be resealed roughly every six months to a year; honed granite needs sealing more frequently. The right care routine depends on how you use the kitchen and maintain the surface.

Think about a typical day: cooking with citrus, setting down a glass, or wiping the counter after breakfast. Acidic substances can etch honed granite, and water spots or fingerprints may still show. A protective coaster and prompt cleanup can limit contact with spills, but they don’t replace regular sealing.

Granite’s Mohs Hardness Scale rating is six to seven, regardless of finish; the finish changes the surface appearance, not the stone’s underlying hardness. Compare your preferred look with the care you’re comfortable giving it. If you’re weighing finishes for your kitchen, explore granite countertop options as part of your decision.

Honed granite’s nonreflective finish may make fingerprints and scratches less noticeable than on polished granite. A leathered surface’s texture can help disguise fingerprints, smudges, water spots, and crumbs.

Honed or Polished Granite: Which Finish Fits Your Kitchen

Fingerprints, grease, and dust on honed surfaces

Honed granite may disguise fingerprints better than polished granite, but water spots and everyday residue can still show. For routine cleaning, wipe with a damp cloth, then dry the surface thoroughly.

Fingerprints and Surface Imperfections

Because a honed finish reflects less light, fingerprints and smudges may be less noticeable than on glossy polished granite. But not every mark disappears: scratches can show more clearly on honed stone. A drag mark near a frequently used cutting area, for example, may stand out against the matte surface. Consider how visible wear will look beside your backsplash and its finish.

Water Spots

Water spots may be more visible on honed granite than you expect, even if fingerprints seem less prominent. Drops around a sink or a damp glass left on the counter can leave marks as water dries. Wipe the area with a damp cloth, then dry it thoroughly. This simple step helps remove visible spots and prevent residue from lingering.

Clean up grease and cooking residue promptly, too. After preparing a meal, wipe splashes near the stove and kitchen island with warm water and a soft cloth. Avoid abrasive cleaning tools, which can affect the stone’s finish. A quick wipe after cooking helps prevent ordinary buildup around food-preparation areas.

Dust and crumbs can collect along counter edges, beside appliances, or where the counter meets a backsplash. Remove loose debris with a soft cloth before wiping, so particles aren’t dragged across the stone. Dry the cleaned area rather than letting water evaporate. This routine is especially useful on a matte surface, where dried spots may catch your eye.

In short, honed granite can make fingerprints less conspicuous, but water spots and scratches may remain visible. Consistent wiping and thorough drying help manage everyday marks.

Honed granite’s susceptibility to stains and etching

Honed granite is slightly more porous than polished granite, so spills may stain it more easily. Knowing the difference between stains and etching helps you respond appropriately.

Stain Susceptibility

A stain occurs when a spill absorbs into stone, and honed granite may be more vulnerable than polished granite. Spilled cooking oil, for example, can leave a mark if it sits on an unsealed surface. Wipe spills promptly and maintain the sealant to help reduce absorption. A leathered finish has texture, but granite still needs protection from spills.

Etching Susceptibility

Etching differs from staining: acidic substances can affect the stone’s surface rather than simply leaving absorbed color. Lemon juice or vinegar, for example, should be wiped up promptly instead of left to sit. Honed granite can etch, so even durable stone needs care around acidic ingredients. Sealing helps guard against stains, but it doesn’t prevent etching.

Sealing Frequency

Honed granite countertops should be resealed at least annually, or even every few months, to help prevent spills and water from absorbing into the stone. Honed granite may need more frequent sealing than polished granite. Regular sealing supports stain protection, while prompt cleanup addresses spills between applications. Include both steps in your care routine.

Choosing granite for a kitchen means weighing its natural character against the care its finish calls for. Explore granite countertop options as you plan a surface that fits your kitchen and everyday routine.

Respond consistently: clean up spills quickly and maintain the sealant, since both steps help prevent stains on honed granite countertops. Treat them as parts of routine surface care rather than relying on either one alone. The goal is to reduce the chance of spills leaving stains.

Absolute Stone Design: Countertops

Absolute Stone Design helps turn your finish preference into a kitchen countertop plan. For homeowners in Richmond, Henrico, Glen Allen, Midlothian, Chesterfield, and Charlottesville, its design services connect visual goals with practical material selection. Bring cabinet tones, lighting, and backsplash ideas into the conversation, along with the care routine you prefer. These details help shape a considered surface choice that suits your kitchen.

After you choose a material and direction, Absolute Stone Design handles countertop measuring, templating, in-house fabrication, delivery, and installation. Precise measurements and templates account for the kitchen’s dimensions, countertop runs, and openings. This process carries your design choices through fabrication and fitting, planning the finished surface for its intended space.

Granite is one option; quartz and quartzite offer other material choices for your project. The right fit depends on the appearance you want and how you use your kitchen. If you’re drawn to granite, consider the finish alongside the stone’s color and pattern. Your preference for a matte or glossy look, and the upkeep you’re comfortable with, can guide your decision.

As your plans take shape, Absolute Stone Design can help bring the material and countertop details together. Discuss how your preferred finish suits the room and project layout before fabrication begins.

If you’re ready to discuss your kitchen countertop project, contact Absolute Stone Design.

Plan a Finish That Feels Like Yours

Your kitchen should feel considered, from the first impression to everyday details. As you decide whether honed granite countertops suit your plans, think about how the finish will work with your lighting, cabinet colors, and daily routine. Taking the whole room into account can help your selection feel cohesive.

The Absolute Stone Design team brings practical knowledge of stone selection and custom countertop projects, helping you shape a design around your preferences. A conversation can be a useful next step as you refine the direction for your kitchen.

Ready to keep planning? Contact Absolute Stone Design to talk through your ideas. Your kitchen can begin with one thoughtful choice.

Frequently Asked Questions

Can stone sealing change honed granite’s color?

It can affect the appearance. One reported experience described a lighter gray honed slab becoming darker after sealing. If preserving the stone’s original tone matters to your design, consider how a sealed sample looks beside your cabinet and backsplash colors before settling on the finished palette.

Can every granite color be honed?

No. Some granite colors may not suit a honed finish because their mineral content can compromise the slab’s integrity during finishing. Your preferred color and finish may not always be available together. Keep your overall design in mind and consider other granite options if a particular slab cannot take the finish.

Which cleaner is suitable for honed granite?

Use gentle, nonabrasive soap and warm water, or a specialty stone cleanser. Choose a cleaner made for natural stone rather than a harsh household product. Apply it with a soft cloth and follow the product directions to clean everyday kitchen residue without abrasive products.

What colors and patterns are available in honed granite countertops?

Colors and patterns vary by slab, and veins, flecks, and natural color variation remain. Darker granite may look lighter or grayer when honed.

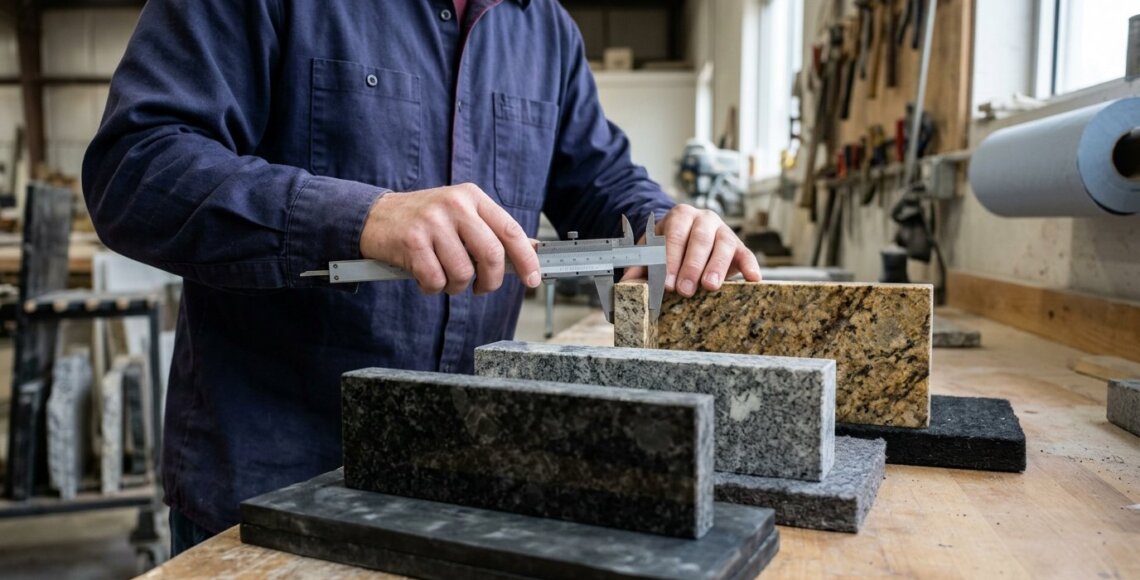
A fabricator checks granite slab thickness beside charcoal, gray, and gold-brown granite offcuts.

Types of Granite Compared by Color, Grade, and Slab Thickness

No granite color is automatically the most durable. The right choice depends on the specific stone and how its slab will suit the countertop. Types of granite are often grouped by appearance, including black, red, green, gold, yellow, pink, gray, and blue. Geologically, granite is defined by its mineral composition: feldspar, quartz, mica, and hornblende. Color can guide the look of your kitchen or bathroom, but it does not tell you everything about performance. Grade labels and slab thickness offer additional points of comparison, but neither is a stand-alone measure of durability. This guide explains how color, grade, thickness, and granite’s geological meaning fit together to help you make an informed selection. Viewing the full slab matters too: natural veining and tone can vary, and the stone may look different across a large surface than in a small sample.

Key Takeaways

  • Learn why a commercial grade label and a geological classification describe different things about a slab.
  • Compare slab thickness thoughtfully, instead of assuming a thicker option or higher grade automatically means greater durability.
  • See how regional names can help you make sense of granite varieties and narrow your material choices.
  • Explore popular kitchen selections and weigh appearance alongside practical factors such as porosity and intended use.

Does the granite’s strength differ between granite colors?

Color alone doesn’t determine how durable a granite countertop will be. Black, red, green, gold, yellow, pink, gray, and blue describe appearance, while a stone’s porosity and condition affect its care and suitability. For an outdoor kitchen, low-porosity granite is generally a better fit. Compare the available colors with the room’s needs and the stone’s care requirements.

Cabinet color can help narrow your choices. Black or gray granite can contrast with white cabinets, while gold or red tones can complement warm wood. Green, pink, and blue varieties add distinctive color, so consider how their patterns will work with cabinet finishes and other surfaces. Granite colors and textures can vary between batches. View the full slab, because a small sample may not show its complete veining or tone.

Granite, quartzite, and engineered quartz are different materials: granite and quartzite are natural stones, while engineered quartz is manufactured. Granite’s geological makeup includes feldspar, quartz, mica, and hornblende, but a stone’s name or color doesn’t reveal its porosity. For a natural-stone project, assess the specific slab rather than assuming every dark or light variety performs alike.

Polished granite has a glossy surface and is often chosen for easier cleaning, though streaks and smudges can show. Honed granite has a matte look, while leathered granite has a textured, more rustic appearance. Matte finishes can help disguise fingerprints and watermarks, making them worth considering for busy countertops.

For maintenance, clean granite with a pH-neutral stone cleaner and use a penetrating sealer as needed. Granite countertops are commonly resealed every 1-2 years; lighter varieties may need particular attention. A water drop that soaks in and leaves a darker area can indicate that the surface needs sealing. Dense black granite may turn cloudy if sealed.

Natural granite comes in varied colors, veining, and textures, giving each slab its own look. Its porosity is an important care consideration, and sealing may be part of upkeep. Compare the slab’s appearance, finish, and care needs together. That gives you a more useful basis for choosing than color alone.

Commercial and geological definitions of granite

“Granite” can mean different things in a geology book and a countertop showroom. Geologically, granite is a natural igneous rock identified by its mineral composition and coarse-grained structure. In commercial stone, the label may describe a broader category of durable, polishable natural stone. So a slab marketed as granite may not fit the narrow geological definition.

For geological classification, mineral content matters more than a slab’s color or trade name. Granite includes feldspar, quartz, mica, and hornblende, and its visible crystals contribute to its natural texture. A geologist evaluates composition and structure, while homeowners typically encounter commercial labels that help distinguish materials during selection.

That difference matters when you compare samples. A product tag reading “granite” is useful when shopping, but it doesn’t tell you every detail about mineral proportions, porosity, or appearance. Looking closely at the slab can reveal crystal size, veining, and color variation that a category name alone can’t convey.

Commercial names also help organize choices by appearance. Two slabs sold as granite may have very different patterns and tones, even though both are natural stone. In a bathroom, one homeowner might prefer a quiet, consistent look, while another might choose pronounced movement as a focal point. The geological label can’t decide which appearance suits the room.

Use each definition for its purpose: geological classification describes what the rock is, while commercial terminology helps identify materials for a project. When reviewing a slab, consider its actual appearance and intended use alongside its sales label. That distinction can make conversations about natural stone clearer and help you compare options with confidence. For a closer look at granite material options, focus on the slab’s visible character and how it will work in your space.

Types of Granite Compared by Color, Grade, and Slab Thickness

What are the main types of granite?

Granite is often grouped by color or variety name, rather than by one universal classification. Common color groups include black, red, green, gold, yellow, pink, gray, and blue. These labels help you start comparing appearance, but they don’t capture every detail of an individual slab. Patterns, crystal distribution, and tone can differ even within one color group.

Variety names offer another way to describe granite. They identify specific commercial options, often with names that suggest a color or visual character. Examples include Absolute Black, Black Galaxy, New Kashmir White, Vizag Blue, Steel Grey, and Imperial Gold. Names can help organize your choices, but they don’t replace seeing the stone itself.

Other named varieties include:

  • New Imperial Red and Jhansi Red
  • Crystal Yellow and Alaska White
  • Blue Dunes, Platinum White, and Rajasthan Black

These labels provide a starting point for narrowing your selection by broad appearance. For example, Steel Grey suggests a different color direction from Imperial Gold, while Blue Dunes points to another palette. The names alone don’t establish how much veining, contrast, or variation a particular slab will have. Natural stone can differ from slab to slab.

Use color groups and variety names to organize your options, then compare actual slabs for tone, pattern, and how each will look in your room. If you’re considering a kitchen countertop, view the stone alongside your cabinets and other finishes. Types of granite may be described by color or by a specific variety name. Understanding both labels helps you compare appearance without treating a name as a ranking of quality or durability.

There isn’t one universal ranking that makes a granite variety right for every kitchen. The useful question is how a candidate will work with your room’s shape and planned countertop details. A long peninsula, compact work area, and broad kitchen island each present the stone differently. Consider where you want the surface to draw attention before settling on a selection.

Countertop planning also affects how a slab becomes a finished surface. Sink and cooktop openings interrupt the stone, while seams divide longer runs into sections. A bold feature near an opening may be partly removed during fabrication, so planned cuts matter as much as the slab’s overall appearance. Mapping those details early helps you understand what will remain visible after fabrication.

  • For a long run: Consider how the visual movement carries across the usable counter area.
  • For a sink zone: Think about which parts of the pattern will remain around the opening.
  • For a kitchen island: Decide whether the surface should anchor the room or complement other design elements.

Edge selection is another design decision. A simple edge keeps attention on the stone’s surface, while a more defined profile adds detail along the counter’s perimeter. The choice can change how the countertop relates to cabinet doors, nearby trim, and the room’s overall style. Consider the edge alongside the planned shape of each countertop section.

Rather than choosing solely by a variety’s reputation, consider how the planned pieces will look after fabrication. A coordinated selection accounts for visible areas, cutouts, edges, and transitions as one design. This gives you a practical way to compare popular options based on the finished kitchen, not just a catalog label.

Ready to plan your kitchen surface? Plan your granite countertop selection around the details of your project.

Absolute Stone Design: Granite

Absolute Stone Design helps Richmond-area homeowners turn a granite selection into a countertop planned for their space. If you’re comparing colors, patterns, or slab details, the team can guide material selection and coordinate precision measuring, in-house fabrication, and installation. This is especially useful when you want the finished surface to fit your kitchen layout and complement your cabinets.

Granite is one option alongside marble and quartz, and each material brings a different look to your project. Consider your priorities, such as natural variation or a more consistent appearance, to clarify which surface suits your plans.

Contact Absolute Stone Design to discuss your countertop project.

Shape a Granite Choice Around Your Home

Your next step is to turn your preferences into a clear design direction. Decide whether the surface should feel quiet or expressive, and how it should support the room’s everyday use. This makes comparisons between types of granite more purposeful, because you’re judging each option against your space rather than an abstract ranking.

Absolute Stone Design offers granite and marble countertops, with a team that can connect material selection to your project’s design. Bring your priorities for color, pattern, and the overall feel of your kitchen or bath into the conversation. The team’s stone expertise can help shape a considered, personal direction.

Whether you’re planning a new surface or refining a renovation plan in Richmond or the surrounding area, make the choice around your home, not a passing trend. Contact Absolute Stone Design to talk through your project and take the next step with confidence.

Frequently Asked Questions

What is the most durable type of granite?

No variety name by itself establishes which slab will be most durable. Start with how you use the surface: a kitchen used frequently for food preparation has different demands from a guest bathroom vanity. Then consider how much routine care you’re comfortable providing. These practical priorities help you compare options without treating a color, label, or grade as a guarantee of performance.

Granite: What’s In a Name?

A variety name helps distinguish one marketed granite selection from another, but it shouldn’t be the only identifier in your project notes. Record the exact name alongside the slab you selected and its intended location. This can keep design discussions clear when coordinating a kitchen countertop, island, and other surfaces. The physical slab remains the reference for its particular appearance.

Which granite is best for outdoor use?

Choose a slab with the outdoor setting in mind, including the surface’s exposure and the look you want alongside nearby materials. For example, an outdoor kitchen beside stone paving may call for a different visual balance from a covered entertaining area next to wood cabinetry. Consider the whole setting and intended use together, rather than choosing based on a granite name alone.

What are the different granite colors and patterns?

Granite ranges from pale, relatively quiet appearances to darker stones with stronger visual movement. For a practical comparison, look at how a pattern reads across the full surface, then picture it around a sink or cooktop opening. Cutouts can change which parts of the design remain visible. This helps you judge the finished countertop, not just an isolated patch of stone.

How do granite types differ in hardness, durability, and porosity?

These properties represent different considerations, so don’t treat one as a substitute for another. A surface may suit your preferred appearance yet require care that doesn’t fit your routine. Think about daily use, likely spills, and how you clean your counters. These habits help you assess what performance means for your household, beyond a broad label or a single material characteristic.

Which granite types are best for indoor and outdoor use?

A slab marketed for a bathroom countertop may also work in a kitchen, but suitability depends on the specific slab and its intended use. For outdoor spaces, consider the setting and the surface’s exposure as part of your selection. Matching the slab to its location means looking beyond the room name and considering how the surface will be used and experienced there.

Charcoal-gray granite countertop with natural mineral flecks in a Richmond rowhouse kitchen

Granite Countertop Colors for Your Room and Lasting Appeal

The best granite countertop colors complement your cabinetry, lighting, and overall palette while still feeling right for years to come. White granite can bring creamy tones and subtle gray veining into a room, while gray options range from soft neutrals to dramatic dark patterns. Explore how color shapes a space, what to consider for lasting appeal, and why viewing the full slab helps you choose with confidence.

Key Takeaways

  • Compare white and gray granite patterns, from subtle veining to bold mineral flecks, to find the look that suits your room.
  • View the full slab and consider whether its pattern is one you’ll enjoy for years.
  • Assess colors beside your cabinetry and in different lighting, since daylight and indoor light can change how a stone appears.
  • Choose a countertop shade with both your room’s palette and your everyday preferences in mind; darker surfaces may make dust and water spots more noticeable.

White and gray granite color options

White granite ranges from creamy to bright, and its mineral patterns make every slab distinctive. White Spring has a creamy base with light gray veins, while New River White pairs soft white with delicate gray lines. Bianco Frost features black, gray, and rust-colored speckles. Pure white granite is rare, so expect natural variation rather than a completely blank surface.

For a lighter kitchen, White Sand blends beige and gray with darker flecks, while White Ornamental has brown and beige specks. Steel Grey offers dark gray tones and a subtle pattern. Black granite creates a deeper look, while brown granite often features warm, earthy shades. Blue granite can contain minerals that catch the light and create depth that photographs may miss.

Quartz generally has more consistent color and requires less maintenance than granite, according to JOEH, LLC. Granite’s natural mineral patterns vary, so slabs with the same name may not look exactly alike. Differences can also occur between batches. Review the actual slab to see its veining, flecks, and color movement before choosing.

Some granite colors can be harder to find because availability depends on the stone and its quarry source. Brown and beige granite are often widely available. Since color names do not guarantee an exact match, assess the specific slab instead of relying only on a sample.

For routine care, clean granite with mild detergent and water. Granite slabs require sealing, so reapply sealer annually or as directed by the manufacturer. The U.S. Environmental Protection Agency notes that liquid may enter granite’s pores or bond strongly to its surface, making prompt cleanup a sensible habit.

Repair options depend on the damage. A small chip may be filled with color-matched stone epoxy, while a crack needs assessment to determine an appropriate repair. Avoid abrasive cleaners around a repaired area, and follow the repair professional’s care instructions.

Snowfall has a white background speckled with gray and black minerals. Bianco Frost has a creamy white background with black, gray, and rust-colored speckles. White Valley has a smooth, light background with subtle gray veining.

Stream White has a soft white background with delicate gray and light brown veins. White Wave has a clean white background with soft waves of gray veining. Steel Grey is dark gray granite with a smooth texture and subtle pattern.

Choosing granite for long-term appeal

A granite pattern can feel striking in a sample but look different across a full counter. Each slab is unique, so you should consider the overall movement, mineral contrast, and balance of colors. Viewing the full slab gives a clearer sense of how patterns will run across the kitchen or bathroom. Choose a color you expect to enjoy for more than 10 years, not only one that matches a temporary accent.

Consider daily cleanup, too. Mid-tone granite with varied speckles can make crumbs and small marks less noticeable than a uniform surface. Dark granite tends to show fingerprints, water spots, and dust more readily. No color hides scratches completely; visibility depends on the mark and the surrounding pattern. Consider how much surface upkeep suits your routine before deciding.

Long-term appeal also depends on how the stone works with lasting room elements. Compare the slab with cabinet colors, flooring, and backsplash materials, then picture the combination if you repaint or replace hardware. A neutral granite can suit changing decor, while a distinctive pattern may become the room’s defining feature. With proper care, granite countertops commonly last 30 years or more.

Follow this practical selection sequence to balance appearance with everyday use:

  • View the full slab to assess its pattern and color movement.
  • Compare it with cabinet finishes and other fixed surfaces in the room.
  • Consider whether its tones and veining suit your preferred look beyond the next renovation.
  • Picture routine crumbs, spills, and dust against the surface before settling on a shade.

For a kitchen used throughout the day, prioritize a pattern and tone that feel comfortable to live with, not just dramatic at first glance. If you’re considering a natural-stone surface, explore granite countertop options as you narrow your selection.

Use a small sample as an initial reference, then review the full slab before choosing. The broader view makes it easier to assess how the pattern travels across the stone, rather than relying on a limited glimpse. This closer look can help you decide whether the overall effect suits your room.

Granite Countertop Colors for Your Room and Lasting Appeal

Granite color selection for room design

Start with your cabinets, then choose granite that complements or contrasts with their finish. With light cabinets, white granite with gray veining can keep the room bright while adding pattern. White Wave pairs a clean background with soft gray movement. Dark cabinets can contrast with lighter granite or blend with warm beige stone.

For example, Sunset Canyon combines beige and light brown hues with subtle veining, while Monte Cristo adds darker speckles and veins. These natural patterns can echo wood floors, cabinet undertones, or nearby tile. Valle Nevado has a neutral gray base with black, white, and brown specks, which can help tie together mixed finishes.

Granite color also responds to room lighting. Daylight and artificial light can make the same stone appear different, so view a sample in both conditions. Blue and green minerals may catch the light and create depth that photographs do not capture. Photos are useful for early planning, but they cannot show every shift in a stone’s appearance.

To assess a pairing, place a cabinet door beside the granite slab, or compare the slab with a clear cabinet photo. Check the combination near the flooring and backsplash, too. This shows whether the granite’s undertones repeat existing colors or compete with them. In an open kitchen, consider how the surface looks from adjoining rooms.

Use these pairings as starting points, not fixed rules:

  • Light cabinets with White Wave can create a bright, softly patterned setting.
  • Dark cabinets with beige granite can bring warmth and contrast into the room.
  • Mixed gray, brown, and black finishes may connect with Valle Nevado’s varied minerals.

Choose a combination that supports the room’s existing palette and the atmosphere you want, whether calm, warm, or dramatic.

Granite selections often center on white, gray, black, and warm beige or brown. Each palette offers a different balance of contrast and pattern, with no single look suited to every room. White Galaxy pairs a bright background with black and gray specks. White Napoli has a warmer base with light gray veining, while white granite is rarely completely pure.

Gray options range from quiet neutrals to bolder patterns. Silver Waves mixes gray and black in swirling patterns, while Steel Grey has a dark gray tone and subtle pattern. Both can complement similar cabinet shades or contrast with lighter finishes. Brown and beige granite adds warmth through earthy tones and darker flecks.

Black granite can anchor a room with a deeper surface, but dark finishes tend to show dust, fingerprints, and water spots more readily. Blue and green varieties offer color and mineral depth that can shift with the light. Because every natural slab has its own markings, the same color family can feel calm or dramatic depending on its veining and flecks.

Use these examples to narrow down the look you want for your room:

  • Bright and defined: White Galaxy adds contrast with black and gray minerals.
  • Soft and warm: White Napoli brings gentle gray lines across a warm white base.
  • Moody and layered: Silver Waves combines dark tones with flowing movement.
  • Earthy and grounded: White Ornamental pairs a creamy base with brown and beige specks.

Names describe a general color direction, not an exact appearance. Look at the particular slab under the room’s lighting to understand its tone, pattern, and visual weight. Explore granite countertop options as you refine the palette for your space.

Absolute Stone Design: Countertops

Absolute Stone Design helps homeowners in Richmond, Henrico, Glen Allen, Midlothian, Chesterfield, and Charlottesville turn granite color choices into countertop plans. When you are ready to move from comparing patterns to planning a surface, the team provides measuring, in-house fabrication, delivery, and installation.

Granite is not the only option to consider. Absolute Stone Design also offers marble and quartz, giving you natural-stone and engineered options to compare as your project takes shape. The right choice depends on the look you want and how the surface will serve your home.

For help planning a countertop for your Richmond-area home, contact Absolute Stone Design.

Turn your color choice into a room plan

Your granite countertop colors can set the direction for the rest of the room. Once you have a favorite, consider how its tones could guide choices such as cabinet hardware, lighting, and decorative accents. A clear design direction can help later updates feel connected, even as individual details change.

Absolute Stone Design offers granite and marble countertops, giving you natural-stone options to consider as your project takes shape. The team’s stone selection and in-house fabrication services can help turn your preferred look into a countertop plan for your space. Whether you are updating a kitchen or adding a surface in another room, start with the colors and details that appeal to you.

Start planning your countertop project with Absolute Stone Design, and take the next step toward a room that feels distinctly yours.

Frequently Asked Questions

How do I choose the right granite color?

First decide whether the countertop should tie several finishes together or stand apart as a focal point. Then consider the visual weight of nearby materials. If a backsplash has a pronounced pattern, for example, quieter granite can help balance the room; a simpler backsplash leaves more room for a strongly veined surface. This gives your color choice a clear design role.

How can I choose a granite color using samples and full slabs?

Use a sample to narrow down the color family, then review the exact slab before fabrication. If your project needs multiple slabs, view them together and consider how their patterns will meet across the countertop runs. Discuss which sections are planned for the island and perimeter, too, to see how the selected stone will read across the design.

What lighting and kitchen features affect how granite countertop colors look?

Task lights can cast shadows across mineral patterns, while direct window light may bring out details that appear subtler in shaded areas. Consider where you prepare food and how light falls across those work zones. Ceiling fixtures, windows, and the direction of nearby light all affect the surface’s appearance, so pay attention to the areas where you spend the most time.

Bathroom Tile Design Ideas for Farmhouse Style and More

Bathroom Tile Design Ideas for Farmhouse Style and More

Bathroom tile design ideas for farmhouse style and more include classic subway layouts, soft neutral palettes, patterned floors, and contrasting textures. These choices help create a room that feels personal and practical: a simple rectangular tile in warm, understated tones, for example, can set a farmhouse mood.

Tile choices shape a bathroom’s visual feel. Vertical layouts draw the eye upward, while light colors and reflective finishes can make the room seem brighter. An accent wall or distinctive floor adds character without covering every surface in a bold pattern.

This guide explores farmhouse and transitional looks, geometric floors, light-reflecting finishes, and durable porcelain options, helping you balance pattern, texture, and scale whether you’re planning a full renovation or refreshing one carefully chosen surface.

Key Takeaways

  • Pair simple rectangular tile layouts with warm, understated tones to create a farmhouse or transitional feel.
  • Let a geometric or mosaic floor become the focal point by keeping nearby surfaces calm and uncluttered.
  • Use light colors, reflective finishes, and coordinated grout to create a more continuous, open look.
  • Choose porcelain tile size and finish with both the room’s appearance and everyday use in mind.

1. Farmhouse and transitional styles

Farmhouse bathrooms pair familiar shapes with warm, understated finishes. Rectangular subway tile gives walls a clean foundation, while soft white, cream, or light gray keeps the room calm. For a transitional look, combine that classic format with a distinctive accent, such as muted blue tile behind the vanity. The contrast adds personality without making the whole room feel busy.

Zellige-style tile brings handcrafted character through subtle variation in color and surface. One example uses 4-inch Zellige Dirty Blue tile as an accent, while 2-by-6-inch Zellige Light Grey subway tile offers a quieter wall treatment. Arrange rectangular tile in straight stacked lines for a crisp, modern effect, or use a vertical offset pattern to give the wall a different rhythm. These layouts let a familiar shape suit several styles.

Material selection shapes both the mood and everyday feel of a bathroom. Ceramic and porcelain offer flexibility in colors, patterns, and formats; natural stone brings an organic sense of luxury. Marble’s soft veining can complement farmhouse neutrals or a coastal palette. Consider how each surface will look beside the vanity, floor, and fixtures, and choose finishes that work together rather than compete.

For a coastal variation, pair white wall tile with pale blue, sandy beige, or sea-glass tones. A restrained palette keeps the room relaxed, while a small accent area adds definition. For farmhouse warmth, combine a light subway tile field with a contrasting niche or vanity wall. Compare samples in the bathroom’s lighting, and weigh each material’s texture, maintenance needs, and durability. A consistent palette helps the tile feel intentional from floor to wall.

Floor choices can reinforce a sense of continuity. Using similar color tones on bathroom walls and floors can make a small space feel larger by reducing visual transitions. For more pattern underfoot, consider penny rounds, mini hexagons, or geometric tiles in a patterned or mosaic floor.

The Astrid Alabaster porcelain mosaic tile is described as having 95% locally sourced materials, offering another mosaic possibility to consider alongside the room’s palette. Keeping the floor’s color and pattern in balance with the wall treatment can help maintain a cohesive farmhouse or transitional look.

2. Hexagonal and patterned floors

A patterned floor can give a bathroom a clear focal point without requiring bold tile on every wall. For example, a checkerboard design can pair 2-inch Zellige Turquoise and White mosaic tiles, creating contrast through color and repetition. Penny rounds, mini hexagons, and geometric shapes offer other ways to introduce pattern. In a small bathroom, keep the vanity, walls, and accessories simple so the floor’s shape remains easy to appreciate.

Tile shape changes a room’s visual rhythm. Hexagons create a repeating, honeycomb-like surface, while square mosaics form orderly grids. Herringbone adds movement with rectangular tiles, and a straight grid feels more restrained. Before settling on a pattern, consider where the floor meets the doorway, shower, and vanity. These transitions affect how shapes align and whether the design feels intentional throughout the room.

How do you choose bathroom tile size, grout color, and layout? Start with the room’s scale and the look you want: smaller pieces suit intricate mosaics, while larger shapes create a quieter field. Choose grout close to the tile color for a blended look, or contrast it to outline each shape. Then select a layout that works with the room’s edges and fixtures.

A 2-by-2-inch porcelain mosaic, such as Sloane Matte Porcelain Mosaic Tile in Pearl, offers a compact square format. Compare it with penny rounds or mini hexagons to see how each pattern changes the floor’s overall impression. Ceramic and porcelain tile both come in varied shapes and finishes, so your selection can balance the look you want with the room’s everyday use. If porcelain fits your plan, explore porcelain tile options as part of your bathroom tile work.

Keep the rest of a small bathroom simple to let patterned or mosaic floor tile stand out. This approach keeps attention on the floor’s design.

Bathroom Tile Design Ideas for Farmhouse Style and More

3. Light-colored tile and reflective finishes

Light-colored bathroom tile reflects natural and artificial light, helping a small room feel brighter and more open. Glossy ceramic wall tile can spread light, especially opposite a window or vanity lighting. For an airy palette, pair glossy white wall tile with a pale floor. If you prefer less shine underfoot, matte floor tile beside glossy wall finishes adds tactile contrast while keeping the room bright.

A monochromatic scheme doesn’t have to feel flat. Stay within one color family, such as warm white, ivory, and pale beige, while varying texture, finish, and scale. A smooth ceramic wall tile can sit beside a small mosaic accent in a similar tone, adding detail without a strong color break. In a small bathroom, repeating one tone across the walls and floor can make the surfaces feel more continuous.

Grout color affects how clearly each tile shape stands out. Match grout closely to a light tile for a quieter surface with fewer visual breaks, or choose a contrasting shade to emphasize a grid or mosaic pattern. Pale grout with cream ceramic tile, for example, softens the joints, while darker grout defines each piece. Compare grout and tile samples together, since color can look different beside a glossy finish or textured surface.

Plan trim as part of the color scheme, not as an afterthought. Coordinating edge trim can make a tiled corner or exposed wall edge feel finished, while contrasting trim creates a deliberate outline. For a cohesive look, repeat a finish from the shower wall at the niche edge, then carry its color into the grout. These bathroom tile design ideas work best when colors, textures, and shapes support one another rather than compete.

4. Durable porcelain floor tiles

Porcelain tile suits many bathroom styles, from traditional patterns to quiet neutral floors. Porcelain tile has a water absorption rate below 0.5%, and large formats create a clean, continuous visual field. Fewer grout lines can also reduce maintenance. For example, 24-by-24-inch porcelain creates a broad, simple look, while smaller pieces add more pattern and movement.

What bathroom floor tiles are slip-resistant and safe for wet areas? Smaller tiles often provide more traction than larger ones, but no tile is automatically slip-proof. Consider the tile’s surface texture and intended use, especially on a shower floor, where water and soap can affect footing.

What are the best bathroom tile ideas for showers, floors, and walls? Pair small-format tile on the shower floor with larger porcelain on the main bathroom floor, then carry wall tile upward for a cohesive look. Floor-to-ceiling tile can visually elongate walls and protect them in wet zones; vertical placement can also make the ceiling feel higher.

What building codes and waterproofing rules apply to bathroom tile in the United States? Requirements depend on the local jurisdiction and the shower or bathroom assembly. Tile is the finish surface, so water management also depends on properly detailed waterproofing beneath or behind it and at transitions.

Large-format porcelain creates fewer grout lines, while small floor tiles add joints and visual detail. A matte finish can give a traditional bathroom a softer feel; a subtle stone-look pattern adds texture without overwhelming neutral walls. Consider how the floor connects to the shower threshold and wall tile, since these transitions shape the room’s overall appearance.

For a coordinated renovation, plan your bathroom tile work around the floor, shower, and wall surfaces together. That approach helps each format and finish feel intentional across the room.

Absolute Stone Design: Bathroom Tile Work

Absolute Stone Design provides bathroom tile work and coordinated stone surfaces to help bring your plan to life. Turn to the team when you’re ready to discuss tile placement and how stone surfaces can work across the space.

If your project also includes a vanity surface, coordinating tile with granite or marble countertops can create a connected look. Consider how the floor, shower, walls, and countertop relate, then shape your material choices around the look you want for your bathroom.

Contact Absolute Stone Design to talk through your bathroom project and next steps.

Shape a bathroom that feels like yours

Your tile plan can be the starting point for a more connected room. Before choosing final details, consider how finishes meet the vanity, lighting, and storage, and which options suit your daily routine. The most useful bathroom tile design ideas reflect your taste while serving the way you use the space.

In Richmond, Absolute Stone Design’s team brings hands-on experience in bathroom tile work and coordinated stone surfaces. If your renovation also includes a vanity surface, the team can help you consider how the tile relates to granite or marble countertops.

Ready to discuss your bathroom project? Contact Absolute Stone Design to talk through your plans and take a comfortable next step.

Frequently Asked Questions

What are the most popular bathroom tile design ideas and trends for 2026?

Farmhouse and transitional looks leave room to combine familiar tile shapes with distinctive surface details. For a fresh take, plan where transitions land: align shower niches, outside corners, and trim with nearby grout lines so the finished design feels intentional. A sample board can help you judge how tile, grout, and edge details work together before committing to a full wall.

Which tile colors and patterns make a small bathroom look larger?

Beyond color and finish, consider how the pattern relates to the room’s proportions. A layout that follows the longest wall can guide the eye through the space, while carefully aligned edges around the doorway and vanity reduce visual interruptions. Keep the main sightline from the entrance clear, and position a mirror to reflect a useful view rather than a cluttered corner.

How do ceramic, porcelain, natural stone, and glass bathroom tiles compare?

Ceramic and porcelain offer a broad range of styles, while natural stone brings distinctive variation from piece to piece. Glass creates a luminous accent and can add depth in a smaller area, such as a niche. Compare samples where they’ll be installed, paying attention to surface variation, edges, and how each material meets adjacent tile. Choose according to the look and placement you want.

What are the steps to plan and install bathroom tile?

Choose the room’s palette, tile size, finish, grout, and layout, then compare samples in the bathroom’s lighting. Plan how the tile meets the doorway, shower, vanity, and trim, and coordinate the floor, shower, and wall surfaces. Ensure waterproofing is properly detailed beneath or behind tile and at transitions.

Installers lift a removed granite countertop section from a Richmond kitchen cabinet run.

Granite Counters Near Me in Richmond for Installation and Removal

A countertop project involves more than choosing a beautiful slab. In Richmond, a search for granite counters near me can lead to decisions about material, installation, and removing an existing countertop. The right choice balances the look you want with the practical needs of your space.

It’s natural to want clarity before updating a kitchen or bathroom. Learn how granite compares with quartz, marble, quartzite, and porcelain, what affects installation and removal, and which decisions to make before the project begins.

Customer projects, material samples, and showroom visits can help you picture the finished space. From natural stone’s distinctive character to the details of replacing an old surface, this guide will help you plan your Richmond countertop project with confidence.

Key Takeaways

  • Understand the main stages of countertop installation and removal so you can plan the transition to a new surface.
  • Compare granite, quartz, marble, quartzite, and porcelain by their appearance and practical characteristics.
  • Use customer project galleries to explore design possibilities and see how different materials look in finished spaces.
  • Make samples and a showroom visit part of your decision process to assess how countertop choices suit your home.

Countertop installation and old-countertop removal

A Richmond kitchen countertop project follows a clear sequence: plan the design, measure the cabinets, create a template, fabricate the surface, and install it. If an existing counter needs removal, coordinate that work with the replacement so the countertop and sink area transition cleanly. For example, the sink opening must match the selected sink, faucet, and cabinet layout.

Granite countertop measurement begins once the base cabinets are securely installed and the finished layout is established. A professional template records wall angles, countertop depth, overhangs, seams, and sink or cooktop cutouts. Have appliance and fixture specifications ready because their dimensions affect openings and placement. Changes to cabinets or sink selections after templating may require adjustments to the plan.

Fabrication turns the approved template into a finished surface. Key design decisions include slab pattern placement, edge profile, seam location, and cutout positions. With natural stone, the layout also determines how visible veining or color variation appears across adjoining sections. Good craftsmanship connects those choices to the kitchen’s function as well as its appearance.

Removal and installation schedules depend on the project sequence, material, fabrication details, and scheduling. A straightforward layout differs from one with several seams or cutouts, so project durations vary. During removal, existing countertop sections are taken away before the cabinets are prepared for the new surface. Installation then involves placing and aligning the fabricated pieces, followed by fitting and finishing around planned openings.

Fabrication and installation costs vary with the project, including material, dimensions, edge details, cutouts, removal, and installation. Ask for an estimate based on your specific plans. Before proceeding, review any warranty or installation-guarantee terms in writing, including coverage, duration, exclusions, and claims handling. Consider material coverage and installation workmanship separately when reviewing those terms.

Granite, quartz, marble, quartzite, and porcelain countertops

Each material brings a distinct character to a kitchen or bathroom. Granite is natural stone, so every slab has its own pattern. Its durability and heat resistance make it a practical option for kitchens, bathrooms, and outdoor settings. For example, Bianco Antico granite pairs natural speckling with traditional or transitional interiors.

Quartz is engineered to resemble natural rock, offering a manufactured alternative to stone’s individual patterns. Calacatta Miraggio Gold shows how bold veining and warm undertones can create a focal point. Marble, by contrast, forms from limestone under heat and pressure. Carrara White marble is known for soft veining and cool tones, and its finish needs attentive care.

Quartzite is metamorphic rock formed when quartz sandstone is exposed to heat and pressure. It is harder than granite and resists heat, scratches, and daily wear. Taj Mahal quartzite brings creamy tones and elegant veining to a design. Porcelain offers another option; consider how its appearance and intended role fit the room’s overall plan.

Compare materials by the qualities that matter most in your space:

  • Granite: natural variation, durability, and heat resistance.
  • Quartz: engineered consistency and patterns inspired by natural stone.
  • Marble: expressive veining and a finish that needs careful maintenance.
  • Quartzite: distinctive natural veining with hardness and wear resistance.
  • Porcelain: another surface category to consider alongside stone and quartz.

Granite countertops are generally recommended for resealing once a year. Marble also needs care and sealing to help preserve its finish, so consider upkeep alongside appearance when choosing a surface.

Seeing materials together can clarify the choice. Explore granite, quartz, and marble countertops as you consider which surface best suits your room and design.

Granite Counters Near Me in Richmond for Installation and Removal

Customer reviews and project galleries

Reviews and project photos offer different insights into a countertop project. A review may describe communication, scheduling, or installation, while a gallery lets you inspect visible details. For example, look at how a granite surface meets a backsplash, cabinet edge, or sink opening.

Look for specific project details in reviews rather than relying on a general rating alone. A useful account might describe removing an old countertop, changing the planned layout, or finishing an edge. Notice whether the reviewer explains the concern and how it was addressed. That context helps you identify which parts of the experience matter most for your kitchen or bathroom.

Project galleries connect design choices with finished rooms. Compare the stone pattern, cabinet color, backsplash, and countertop finish as a whole. A custom granite countertop may show natural variation across its surface, so photos can help you picture how a pattern looks in a real space. Keep in mind that lighting and screen settings affect how colors appear.

Prefab and custom-size countertops suit different project needs. A prefab piece comes in a pre-cut format, while a custom-size countertop is shaped for a particular layout. An island with an unusual edge or sink cutout, for example, may need measurements tailored to its design. The cabinet configuration and chosen surface help determine which approach fits.

Use reviews and images together, not as substitutes for project-specific planning. A gallery can reveal a finish or layout you like, while a review may highlight details to discuss in an estimate request. Save examples of features you prefer, such as a softly rounded edge, visible natural veining, or a continuous granite pattern. These references make your design goals easier to explain.

  • Reviews: Look for project details about communication, removal, and installation.
  • Photos: Note material appearance, finish, edges, and how the surface meets nearby features.
  • Design references: Save examples that reflect the layout and style you want.

Countertop samples and showroom visits

A sample lets you assess color and texture beyond a photograph. When choosing granite, compare its pattern with your cabinets, flooring, and backsplash. A small piece won’t show every variation in a full slab, but it can help you decide whether warm veining or cooler tones suit your kitchen.

Lighting affects how colors appear. Creamy stone beside a white cabinet may look different under warm indoor lighting than it does near a window. During a showroom visit, compare a sample in different lighting and view it beside finishes similar to your planned cabinets. This helps you judge whether the surface feels cohesive.

Bring design references into the decision. A cabinet-door finish, flooring sample, or room photo makes comparisons more specific. If you’re planning Carolina blue accents, for example, consider whether the countertop’s undertones complement that color or compete with it. Aim for a balanced palette rather than an exact match between every surface.

During a showroom visit, look beyond color. Examine the stone’s texture, veining, and polished or subdued appearance, then consider how those details suit the room’s daily use. Compare similar tones side by side. A subtle difference in pattern movement or contrast may affect the overall impression more than a small color shift.

Samples help narrow your choices, while viewing larger sections of material helps you understand natural variation. This is especially useful with granite, since a small sample cannot represent every feature of a full surface. Keep your preferred colors, edge style, and room references together when requesting an estimate. They provide a clear starting point for the design conversation.

  • Compare: View samples beside cabinet and flooring finishes.
  • Consider: Check how lighting changes color and texture.
  • Decide: Keep the palette and surface details that best suit your room.

Ready to connect your material selection with a project plan? Request a countertop estimate with your preferred colors and design references.

Absolute Stone Design: Granite

Absolute Stone Design helps plan Richmond countertop projects around your space, material preferences, and design goals. When you’re ready to move from comparing surfaces to planning granite countertops, the team provides measuring, fabrication, and installation. You can also consider marble, quartz, or quartzite.

Bring your preferred colors, room details, and project examples to the conversation. These references help clarify what matters most, whether you’re updating a kitchen surface or considering a different countertop look. With your material choices in mind, you can focus your estimate request on the project scope and finish that suit your home.

Contact Absolute Stone Design to discuss your countertop project.

Make Your Countertop Plan Personal

The next step is choosing what fits your home. Consider how you want the room to feel, which surfaces you use every day, and which details matter most. If you’re searching for granite counters near me in Richmond, let those priorities guide a project conversation rather than choosing a material based on appearance alone.

Absolute Stone Design fabricates and installs countertops in granite, marble, quartz, and quartzite, giving you several natural and engineered stone options for your space. Share the room you’re updating, the look you hope to create, and any design references that express your vision. These details help shape a countertop plan that feels distinctly yours.

Contact Absolute Stone Design to discuss your countertop project. Your next step can begin with a simple conversation and a clearer picture of the space you want to create.

Frequently Asked Questions

Where can I find granite countertop fabricators and installers near me?

For granite counters near me in Richmond, Absolute Stone Design fabricates and installs granite countertops in Richmond, Henrico, Glen Allen, Midlothian, Chesterfield, and Charlottesville. Precision measuring and templating tailor the finished surface to your layout. A kitchen island and perimeter counters, for example, can be measured as separate sections so the fabrication plan accounts for each area’s dimensions and intended use.

What does granite countertop installation cost per square foot near me?

Granite installation pricing depends on the project, and an estimate is provided after a quote request. The area being covered is only one factor: granite selection, layout, cutouts, edge details, removal, and installation can all affect the scope. A countertop with a sink opening and separate island, for example, involves different fabrication details from a simple run of counter. Use these factors to understand what shapes an estimate when comparing granite counters near me.

How much do granite countertop slabs cost near me?

Granite slab pricing depends on the material selected and the countertop project. Request an estimate based on your plans. The estimate considers the stone alongside the planned dimensions and fabrication needs. A slab’s pattern and its layout across connected counter sections can also influence your selection. When requesting an estimate, share the areas you’re updating and your preferred granite look.

What is the granite countertop installation process and timeline?

Granite installation proceeds from project planning and measurement to templating, fabrication, and installation. The schedule depends on the chosen stone, layout, cutouts, and coordination with removal of the existing counter. A kitchen with a separate island and sink opening needs those details included in the project plan. Absolute Stone Design provides measuring, delivery, and installation for countertop projects.

Where can I read granite countertop contractor reviews and ratings near me?

Look for reviews describing a specific countertop experience rather than relying on a rating alone. Absolute Stone Design customer feedback includes Lorraine K., who described work on four kitchens, and Nathan D., who shared positive feedback about granite countertop installation. Their comments offer different perspectives: one reflects multiple kitchen projects, while the other focuses on a granite installation in the Richmond area.