
How to Plan and Complete a Countertop Installation
A countertop installation is best handled by a professional for most homeowners, particularly when the material is heavy stone or the layout includes precise cutouts. Most installations take about 4-8 hours, depending on the material and layout, while larger projects may extend into a second day. The process starts with accurate measurements and preparation, then moves through fabrication, fitting, and finishing.
It’s understandable to wonder whether you can take on countertop installation yourself. This guide explains how to plan the project, prepare the space, coordinate measurements and fabrication, and understand what happens on installation day. You’ll also learn when professional help can make the process more manageable, so you can make informed decisions before your new surface arrives.
Key Takeaways
- Plan timing around the material and layout; fabrication and fitting are separate stages of the project.
- Prepare the room by clearing surfaces and ensuring cabinets and appliances are ready before templating.
- Coordinate measurements, material choices, cutouts, and access details with the fabricator before installation day.
- Understand the fitting and finishing sequence, including when sinks and backsplashes can be connected afterward.
Do granite and quartz take longer to install than laminate?
Plan for both fabrication and fitting, since the material and layout shape the schedule. Granite, quartz, marble, and laminate do not share one guaranteed timeline.
Compare Timelines by Countertop Material
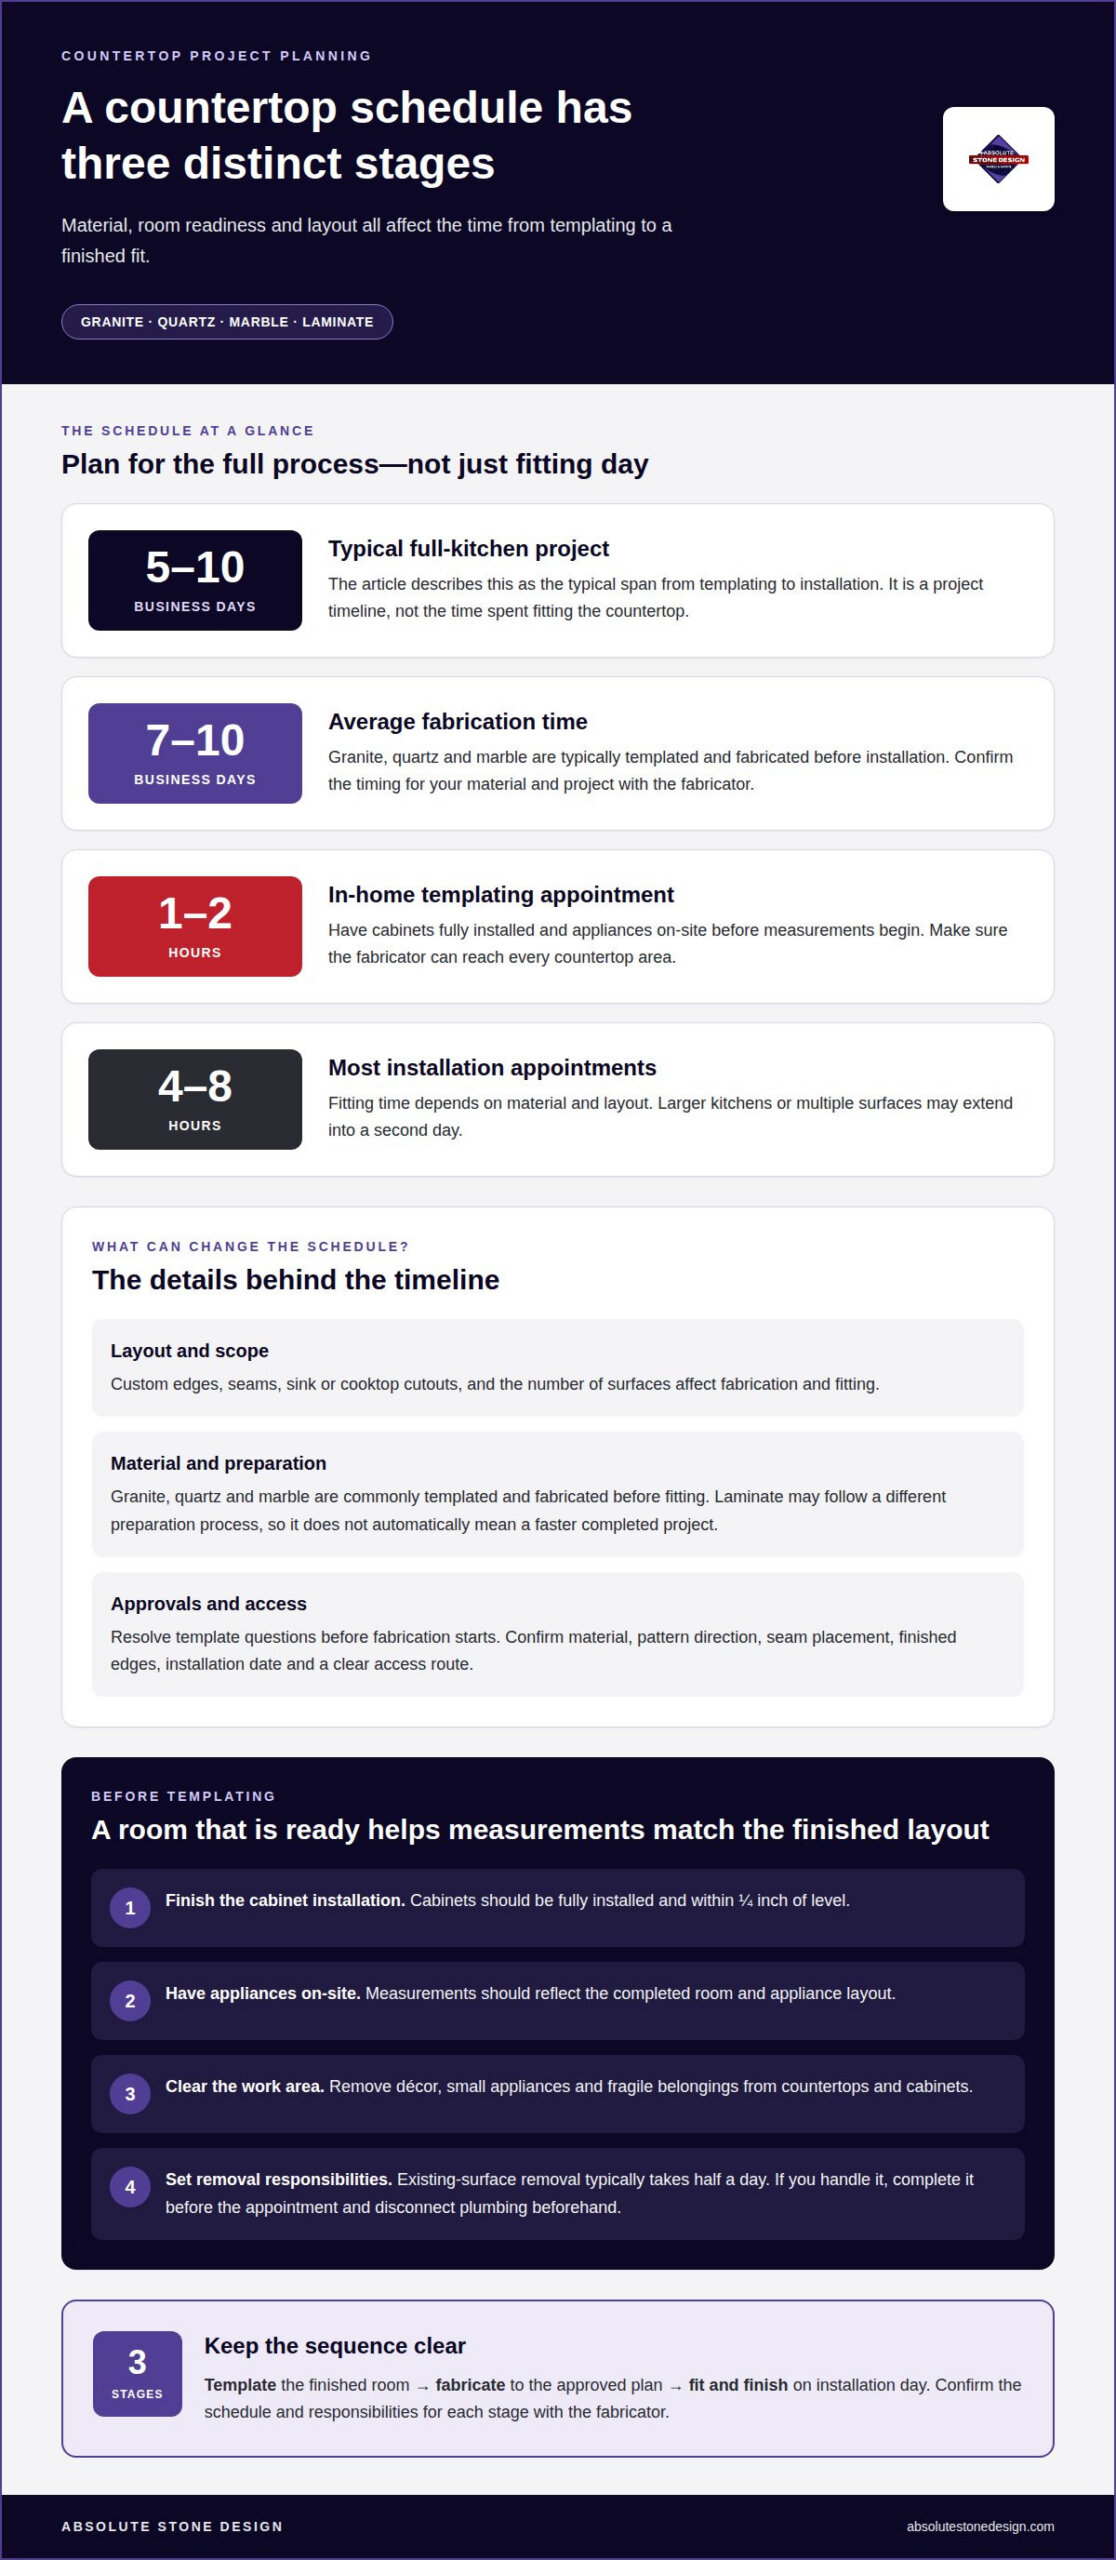
Compare the full schedule for each material, not just the hours spent fitting it. Granite, quartz, and marble are typically templated and fabricated before installation; fabrication usually takes 7-10 business days on average. A full kitchen project typically takes 5 to 10 business days from templating to installation. Laminate may involve a different preparation process, so don’t assume it always means a faster completed project.
Identify Factors Affecting the Timeline
Map the details that can change the schedule before settling on an installation date. Most installations take about 4-8 hours, depending on material and layout, while larger kitchens or multiple surfaces may extend into a second day. Custom edges, seams, sink or cooktop cutouts, and the number of surfaces affect fabrication and fitting. Confirm the sequence for templating, fabrication, and installation so each stage has room in the plan.
- Ask about local requirements. Permit and building-code requirements can depend on your location and the work involved. Contact the local building department to learn whether your project requires a permit or must meet local code provisions.
- Plan lavatory height where accessibility matters. According to the U.S. Access Board, ADA standards set the maximum lavatory height at 34 inches, measured to the rim or counter, whichever is higher. The U.S. Access Board states lavatories and sinks must be installed with the higher of the rim or counter surface no more than 34 inches above the finish floor or ground.
- Account for cost drivers. The price depends on the case and is given after a quote request; material, project size, layout, cutouts, and edge details affect the total.
- Read warranty terms before choosing. Review what the written warranty covers for the material and installation, including exclusions and the process for reporting an issue. Coverage depends on the specific warranty terms.
Can I Install New Countertops on My Own, or Should I Hire a Professional?
A simple project may suit an experienced DIYer, but stone requires careful handling and precise fitting. Countertop installation involves more than placing a surface, so use these steps to assess the preparation and scope.
Prepare the Home for Installation
- Clear countertops and cabinets of décor, small appliances, and fragile items. Have cabinets fully installed and appliances on-site before templating, so measurements reflect the finished layout. Check that cabinets are within ¼ inch of level. This preparation can reveal fit concerns before fabrication begins.
- Decide who will remove the existing surface. Removal typically takes half a day; if you handle it, finish ahead of the appointment and disconnect plumbing beforehand. Keep belongings out of the work area.
Compare Installer Quotes
- Compare the scope line by line, not just the final figure. Look for matching material, measured areas, edge details, sink or cooktop cutouts, seams, and removal work. If one estimate describes a different layout or leaves out a task, the figures won’t represent the same project.
- Review the proposed sequence and responsibilities. Note who handles templating, fabrication, fitting, and plumbing disconnection. Stone work requires precise measurement and heavy pieces, so consider whether your skills and equipment suit the job. Choose a plan that clearly covers the work your project needs.
Review the Installation Estimate
- Read the professional countertop installation estimate for the selected material, dimensions, edge profile, cutouts, backsplash details, and fitting work. Confirm that it describes the finished design you discussed, including seams and any removal. Ask for unclear scope items to be explained before agreeing.
- Check the schedule for templating, fabrication, and fitting, along with the written warranty terms. These details clarify what the estimate covers and how the work proceeds. For help planning the surface and its details, explore countertop project guidance.
Coordinating with the fabricator
Good coordination connects your design decisions with accurate measurements and fabrication. Follow these steps to keep details, approvals, and scheduling aligned.
- Schedule templating after the room is ready. Have cabinets fully installed and appliances on-site before measurements begin. An in-home template appointment typically takes 1-2 hours. Confirm the fabricator can access every countertop area, including corners and adjoining surfaces. Measurements taken before the finished layout is in place may need revisiting.
- Share the intended layout and use. Identify sink and cooktop locations, overhangs, seams, and edge details before fabrication. A sink centered beneath a window, for example, affects cutout placement. Walk through each surface with the fabricator and make sure design choices correspond to the measured room.
- Review the template before work proceeds. Check that the plan reflects walls, corners, appliance openings, and adjoining countertop runs. Point out unusual angles or features that could affect fit. Resolve measurement questions before fabrication starts, because the stone or other material will be cut to match the approved template.
- Confirm material and fabrication decisions. Agree on the selected slab or surface, visible pattern direction, seam placement, and finished edges. For stone, discuss how the pattern will appear across joined sections. Countertop fabrication takes 5 to 7 business days after templating, so clarify when approvals are needed to keep the sequence moving.
- Coordinate the installation appointment. Confirm the planned date, access route, and cleared work area with the fabricator. Mention narrow doorways, stairs, or other obstacles before delivery. If the project includes a sink or cooktop, coordinate the related reconnection; a plumber typically reconnects it the day after installation.
Countertop installation steps
Follow the sequence from final site preparation through fitting and reconnection. Each stage helps protect accurate measurements, the finished surface, and a proper fit.
- Prepare the work area. Clear the counters and nearby cabinets of décor, small appliances, and fragile items. Make sure the route from the entrance to the kitchen or bathroom is accessible for the installation team and countertop pieces. Keep pets and household activity away from the work zone so installers can position each section safely.
- Inspect the cabinets and template. Confirm the cabinets are fully installed and level before the new surface arrives. The approved template should account for walls, corners, seams, and cutouts. Compare the planned sink and cooktop openings with the appliances on-site, since a mismatch can affect fit and later connections.
- Position and fit each section. Installers place the countertop sections onto the prepared cabinets, then align edges and seams. Stone pieces are heavy, so careful handling matters during placement. The team checks how adjoining surfaces meet and whether the finished edges and cutouts align with the approved layout.
- Complete seams and finishing. After positioning, installers join sections and finish the visible transitions. Look over the countertop surface, edges, and openings before the work area is cleared. A consistent seam and a close fit against walls help the finished surface feel visually continuous.
- Coordinate reconnections and settling. Sinks and backsplashes can typically be connected within 24-48 hours after installation. When a replacement includes a sink or cooktop, a plumber typically reconnects it the day after installation. Keep heavy objects off the new surface for at least 24 hours, and follow the care directions for the selected material.
- Consider the existing surface carefully. Some countertop systems may allow installation over an existing surface, but added height, weight, poor support, or an uneven base can create fit problems. Existing damage may also remain hidden. Confirm that the new surface and underlying structure suit this approach before proceeding.
Ready to plan the fitting sequence for your space? Plan your countertop project.
Absolute Stone Design: Countertops
Absolute Stone Design helps you choose a surface and plan countertops suited to your home and daily routine. If you’re weighing granite, marble, or quartz, discuss how each option fits your room, preferred look, and practical needs. These choices shape measurements, edge details, cutouts, and the fabrication plan.
Turn to Absolute Stone Design when you’re ready to choose materials and coordinate the next steps for your countertop project. Sharing your preferred surface and details about your space helps focus the conversation on the finished design.
Contact Absolute Stone Design to discuss your countertop plans.
Make Your Next Countertop Decision With Confidence
Your next step is to turn inspiration into a clear design direction. Think about how you use the room each day, which details matter most, and how the surface should complement your cabinets and finishes. These choices help shape a space that feels considered, practical, and personal.
Absolute Stone Design offers granite and marble countertops. As you plan your countertop installation, consider how your preferred material will work with the room’s layout and everyday routines. Discussing your project can help bring the design into focus without rushing your decision.
Explore countertop options with Absolute Stone Design and discuss your countertop installation plans as you take the next step toward a surface that feels at home in your space.
Frequently Asked Questions
How Long Does It Take to Replace Countertops?
Plan for about one day of on-site work for a typical countertop replacement. The full project takes longer because templating and fabrication happen before the crew fits the finished pieces. Keep your kitchen schedule flexible if your project includes several surfaces or a changed layout. In Richmond-area homes, coordinating removal and replacement helps you plan around temporary kitchen disruption.
How long does countertop installation take from start to finish?
From templating to final fitting, most projects take 10-15 business days. That window covers more than the time spent in your home: design decisions, fabrication, and scheduling all affect the overall sequence. For example, approving the edge profile and sink opening promptly helps keep the chosen design aligned with fabrication. Ask for the timeline to be explained by stage so you can plan household routines.
What Can Affect the Countertop Installation Timeline?
Layout changes after templating, delayed appliance delivery, and additional cutouts can affect the schedule. A cooktop or sink opening must match the actual fixture, while a corner or long run may need careful seam planning. Material availability and approval timing also influence the sequence. To avoid unnecessary pauses, settle design details before fabrication begins and have appliance specifications ready for the measuring appointment.
What should I do to prepare for installation?
Before the crew arrives, empty drawers and cupboards below the work area if they contain fragile items, and keep children and pets away from the route. Make a clear path from the entry to the kitchen, including tight turns near doorways. Arrange an alternative place for meals, too. A working sink or cooktop may be unavailable until its connections are restored.
How long does countertop installation take from measurement to completion?
For a full kitchen, allow time between templating and installation, as the schedule can vary with project details. That interval begins after the room is ready to measure and ends when the new surface is fitted, not when every related task is finished. Sink or cooktop reconnection can follow separately. Confirm the sequence for those fixtures so you can distinguish countertop completion from the return of full kitchen use.
What are the steps to prepare for countertop installation?
Start by finalizing cabinet placement and having appliances available for accurate measurements. Then remove countertop items, protect breakables, and clear the route into the room. If you’re removing an old surface yourself, finish that work and disconnect plumbing before the appointment. Keep sink and cooktop details accessible so their openings can be coordinated with the measured layout and selected fixtures.